Locations - Dark Souls
- Base Game Locations
- Undead Asylum
- Firelink Shrine
- Undead Burg
- Undead Parish
- Darkroot Garden
- Darkroot Basin
- Lower Undead Burg
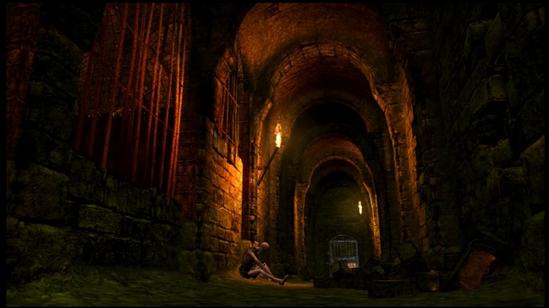
- Depths
- Blighttown
- Valley of the Drakes
- Sen's Fortress
- Anor Londo
- Demon Ruins
- Lost Izalith
- New Londo Ruins
- Tomb of the Giants
- Ash Lake
- Chasm of the Abyss
- Painted World of Ariamis
- Royal Wood
- The Abyss
- The Duke's Archives
- Kiln of the First Flame
- The Catacombs
- Quelaag's Domain
- The Great Hollow
- Crystal Cave
- Artorias of the Abyss DLC Locations
Base Game Locations
Undead Asylum
 Undead Asylum (北の不死院) is the first Location in Dark Souls. It is reached upon the player beginning a new game or New Game+, and leads to Firelink Shrine. It ultimately serves as an introduction to the game's mechanics, namely combat, loot, and death.
Information
Undead Asylum serves as the game's tutorial, introducing basic mechanics and combat. Players begin imprisoned in a cell and must escape while navigating the dangers of the asylum, including environmental hazards and increasingly powerful foes.
Area Bosses
Mandatory
- Asylum Demon
Merchants
- Snuggly The Crow, who operates the Warm and Fuzzy Exchange.
Items
- Dungeon Cell Key: Found on a corpse in your cell, used to unlock the cell door.
- Class-Specific Shield and Weapon: Located near the Hollow Archer after escaping the Asylum Demon.
- Estus Flask: Received from Oscar of Astora after speaking with him.
- Undead Asylum F2 East Key: Also obtained from Oscar, used to access the second floor.
- Big Pilgrim’s Key: Granted after defeating the Asylum Demon, allowing exit to Firelink Shrine.
- Humanity: Dropped by the Asylum Demon upon defeat.
Walkthrough
First Encounter with the Asylum Demon
- Upon exiting the starting cell and lighting the first bonfire, proceed through the large door. The Asylum Demon will appear in the central room, and the door you entered through will close.
- If you're unprepared or lack confidence, immediately escape through a small doorway on the left side of the arena.
Tips for Defeating the Demon:
- Defeating the Asylum Demon on the first encounter is challenging but possible. If you succeed, you’ll be rewarded with the Demon’s Great Hammer.
- If you opt to escape, you can revisit this encounter later with better gear and experience.
Navigating the Asylum
- Archery Trap: After escaping the Demon, you'll encounter a Hollow Archer with a message nearby suggesting the use of a shield. Pick up the shield and a starting weapon from nearby corpses.
- Boulder Trap: Ascend the stairs, but be cautious—a boulder will roll down towards you. Avoid it by dodging to the side. The boulder will break a wall, revealing a room with the knight who freed you in the opening cutscene.
Oscar of Astora (Elite Knight of Astora)
- Found behind the broken wall caused by the boulder. Speak with him and answer "Yes" to receive the Estus Flask and the Undead Asylum F2 East Key. If you already defeated the Asylum Demon, you’ll also receive the Big Pilgrim’s Key.
- After speaking, Oscar dies, granting 100 souls. If you choose "No" or kill him, you can still acquire his drops.
Second Encounter with the Asylum Demon
- Use the key from Oscar to open the door leading to the second floor. If playing as a Sorcerer, Pyromancer, or Cleric, collect your casting catalyst from the nearby corpse.
- Approach the white fog gate to trigger the boss fight. Execute a plunging attack as you fall into the arena for significant damage. You must defeat the Asylum Demon here to proceed.
Reward: Victory grants the Big Pilgrim’s Key and Humanity. Use the key to exit through the large door and proceed to Firelink Shrine.
Firelink Shrine
- Ascend the cliffside path to trigger a cutscene, transporting you to Firelink Shrine. From here, your journey into Lordran begins.
- You can revisit the Asylum later via the giant crow at Firelink Shrine.
Soul Farming
Notes
Trivia
Firelink Shrine
 Firelink Shrine (火継ぎの祭祀場) is a Location in Dark Souls. It is accessed directly after the Undead Asylum, and connects to multiple areas.
Information
The Firelink Shrine serves as the central hub in Dark Souls, connecting multiple areas and hosting a variety of NPCs who arrive and depart as the story progresses. Players can interact with these characters to purchase items, learn spells, and engage in quests that impact the game's narrative.
NPCs
Crestfallen Warrior
- Location: Sitting near the bonfire.
- Details: A dejected man who offers cryptic yet insightful advice. Eventually, he ventures off to explore but succumbs to despair.
Anastacia of Astora (Fire Keeper)
- Location: In a cell below the shrine's bonfire.
- Details: The mute Fire Keeper of Firelink Shrine. She maintains the bonfire and can upgrade Estus Flasks with Fire Keeper Souls.
- Events:
- Anastacia is murdered by Lautrec of Carim after two bells are rung. She can later be revived.
- Initially does not speak, but her voice is heard after her resurrection.
Petrus of Thorolund
- Location: Near the bonfire.
- Details: A portly cleric who sells miracles and talismans. He initially provides a Copper Coin and later offers to join the Way of White covenant.
- Events:
- Awaits the arrival of Rhea of Thorolund and her escort (Nico and Vince). Leaves with them for the Catacombs but later returns alone.
- Petrus’ actions have significant consequences for Rhea’s survival.
- Drops: Humanity x2 (if killed).
Rhea of Thorolund and Her Escorts (Nico and Vince)
- Location: Appear near Petrus after the Capra Demon is defeated.
- Details: A cleric and her bodyguards.
- Events:
- Petrus betrays Rhea, leaving her to die in the Catacombs. Killing Petrus beforehand triggers hostility.
Knight Lautrec of Carim
- Location: Initially found imprisoned in the Undead Parish.
- Details: Freed after ringing both bells, Lautrec murders Anastacia and escapes. His betrayal triggers a questline where players can invade and kill him to restore Anastacia.
- Events:
- Players may preemptively kill Lautrec to prevent Anastacia's death.
- Drops: Soul of Anastacia (if killed after her murder).
Griggs of Vinheim
- Location: Rescued from the Lower Undead Burg.
- Details: A sorcerer who sells spells and magic-related items. Requires 10 Intelligence to interact with his shop.
Laurentius of the Great Swamp
- Location: Rescued from the Depths.
- Details: A friendly pyromancer who teaches basic pyromancies and upgrades Pyromancy Flames to +15.
- Events:
- If the player interacts with Quelaana of Izalith, Laurentius becomes obsessed and departs, ultimately disappearing.
Domhnall of Zena
- Location: Moves to Firelink Shrine after both Bells of Awakening are rung.
- Details: A merchant selling unique boss-related items and armor.
- Unlockable Gear:
- Golem Set (Iron Golem).
- Ornstein or Smough Set (final boss defeated in Anor Londo).
- Gwyndolin Set (Dark Sun Gwyndolin).
- Gwyn Set (Lord of Cinder, post-game).
Big Hat Logan
- Location: Rescued from Sen’s Fortress.
- Details: A renowned sorcerer who sells advanced magic. Requires 15 Intelligence to interact with his shop.
- Events: Leaves the shrine later in the game to pursue his studies.
Siegmeyer of Catarina
- Location: Appears near the bonfire after certain events.
- Details: A jovial knight on a journey. He departs frequently as his questline progresses.
Sieglinde of Catarina
- Location: Appears after rescuing her from the Duke’s Archives.
- Details: Siegmeyer’s daughter, pursuing her father. Returns to the shrine briefly after her rescue.
Kingseeker Frampt
- Location: Appears in Firelink Shrine after ringing both Bells of Awakening.
- Details: A primordial serpent who guides the player toward the Lordvessel quest. Can consume items to exchange for souls or materials.
- Notes: Attacking him renders him inactive, though he reappears after reloading the game.
Items
General Items:
- Cracked Red Eye Orb – Found in the same chest as the Homeward Bone.
- Lloyd’s Talisman – Found in the same chest as the Homeward Bone.
Rings:
- Ring of Sacrifice – Found under the aqueduct bridge by performing a jump to reach it.
Weapons and Shields:
- Morning Star – Found in a chest near Petrus.
- Talisman – Found in the same chest as the Morning Star.
- Winged Spear – Found in the graveyard near the large skeletons.
- Zweihander – Found in the graveyard near the cliff edge.
- Crest Shield – Dropped by the Hollowed Knight of Astora (Oscar) upon returning to the Asylum.
- Twin Serpent Kite Shield – Found in the graveyard.
Special Items:
- Binoculars – Found near the cliff edge in the graveyard.
- Undead Asylum F2 West Key – Found on the roof near the giant crow’s nest.
- Rusted Iron Ring – Found in the Northern Undead Asylum after revisiting.
- Peculiar Doll – Found in the Northern Undead Asylum after revisiting.
Consumables:
- Soul of a Lost Undead – Scattered throughout the area.
- Large Soul of a Nameless Soldier – Found on the path to the graveyard.
- Large Soul of a Lost Undead – Found near the well and in the graveyard.
- Estus Flask (5) – Given by the bonfire.
- Humanity – Found on the well near Petrus of Thorolund.
- Fire Keeper Soul – Found in New Londo Ruins, accessible via the staircase from the shrine.
- Homeward Bone – Found in a chest near Petrus.
Notes
- NPC Interactions: Many NPCs leave the shrine permanently as their questlines progress, so be sure to purchase or interact with them while they’re available.
- Returning Items: If important quest items are lost, they can be retrieved from the empty chest near the water's edge.
- Skeletons: The nearby graveyard is home to challenging enemies early in the game. Use blunt weapons or parry techniques for easier combat.
- Items in chests near Petrus are easily accessible but can be missed if not explored.
- The Peculiar Doll and Rusted Iron Ring require revisiting the Northern Undead Asylum via the giant crow.
Trivia
- Firelink Shrine serves as a geographical and thematic midpoint in Dark Souls, connecting most major areas.
- Sieglinde of Catarina's questline mirrors that of Siegmeyer, showcasing the cyclical nature of familial roles in the game.
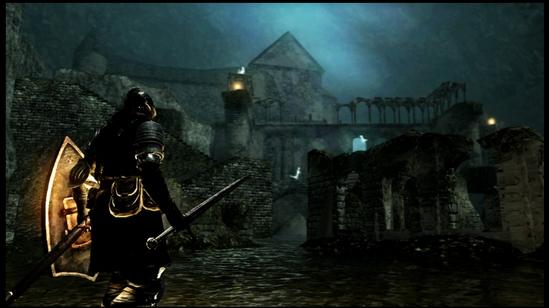
Undead Burg
 Undead Burg (城下不死街) is a Location in Dark Souls. It is accessible via Firelink Shrine, and leads to the Undead Parish.
Information
The Undead Burg is an early-game area that introduces players to a variety of enemy types and gameplay mechanics. It serves as a path to several key areas, including the Taurus Demon boss, Black Knight encounters, several merchants.
Area Bosses
Mandatory
-
Taurus Demon
Enemies
Black Knight:
-
- Location: Found down a staircase in the area near the crossbow Hollow Soldiers.
- Details:
- Guards the Blue Tearstone Ring, which boosts defense when HP is low.
- Strong opponent with high poise.
- Effective Strategies:
- Backstabs are highly effective.
- Dodge heavy attacks using rolls or block lighter attacks with a shield.
- Alternatively, use ranged attacks (15+ Firebombs can defeat it from a safe position).
Havel the Rock:
-
- Location: Found behind a locked door in the tower before the Taurus Demon. Accessible with the Watchtower Basement Key (acquired after the Moonlight Butterfly) or the Master Key.
- Details:
- Extremely high poise and strong melee attacks.
- Drops Havel’s Ring, which increases equipment load.
- Effective Strategies:
- Use backstabs or hit-and-run tactics.
- Lure Havel outside the tower and attack with ranged weapons or firebombs while he retreats.
- Requires patience and focus if attempting in early-game with un-upgraded weapons.
Merchants
Male Undead Merchant:
- Found below a staircase near the first bonfire.
- Sells:
- Firebombs (50 souls each)
- Repair Powder
- Residence Key
- Throwing Knives
- Drops the Uchigatana if killed.
Items
General Items:
- Garbage – Found near a ladder that leads back to the entrance area.
- Soul of a Nameless Soldier – Located on the lower route near the merchant.
- Gold Pine Resin – Found in a chest behind a locked door (requires the Residence Key or Master Key).
Weapons and Shields:
- Wooden Shield – Located on the balcony near the bonfire.
- Light Crossbow – Found on a rooftop near throwing knives.
- Claymore – Found on the large bridge guarded by the Hellkite Drake.
- Drake Sword – Obtained by severing the Hellkite Drake’s tail.
Rings:
- Blue Tearstone Ring – Dropped by the Black Knight near the staircase.
- Havel’s Ring – Dropped by Havel the Rock.
Consumables:
- Throwing Knives – Found on a rooftop near the merchant.
- Black Firebombs – Found in a chest.
- Humanity – Dropped by various enemies and found near the starting bonfire.
Walkthrough
From Firelink Shrine to the First Bonfire
- Starting Path:
- Begin at Firelink Shrine, ascending the stairs to the right.
- Clear the Hollow Soldiers as you proceed toward the aqueduct.
- Entering Undead Burg:
- Cross through the aqueduct and into the Undead Burg.
- The path diverges:
- Lower Route: Leads to consumables and minor items.
- Upper Route: Leads to progression.
- Take the upper route, clearing Hollow Soldiers with crossbows and swords.
- First Bonfire:
- Enter the building near the crossbow Hollows to find the first bonfire.
- This bonfire will serve as a key checkpoint for most of your exploration in this area. Kindle it early for increased Estus Flask charges.
From the Bonfire to the Taurus Demon
- Hollow Ambushes:
- Move up the staircase from the bonfire and deal with Hollows waiting in ambush.
- Check the area near the spear-wielding Hollows to find the merchant.
- Narrow Path to the Battlements:
- Progress through the narrow streets filled with multiple enemies.
- Use firebombs or lure enemies out to prevent being overwhelmed.
- Loot the area for the Black Firebombs from a chest and other consumables.
- Path to the Boss:
- At the spiral staircase, choose:
- Lower Route: Leads to the Black Knight, guarding the Blue Tearstone Ring.
- Upper Route: Leads to the Taurus Demon boss fog gate.
- Clear enemies on the spiral staircase and ascend to reach the fog gate.
- At the spiral staircase, choose:
The Taurus Demon
- Preparation:
- Eliminate the two crossbow Hollows atop the nearby tower before entering the fog gate.
- Buff your weapon with Gold Pine Resin for increased damage (optional).
- Battle Strategy:
- Lure the Taurus Demon to the center of the bridge.
- Climb the ladder to the tower, and perform plunging attacks for significant damage.
- After the attack, retreat to a safe distance or circle around to repeat the process.
- Victory:
- Defeating the Taurus Demon unlocks access to the bridge guarded by the Hellkite Drake.
Covenants
Warrior of Sunlight:
- After defeating the Taurus Demon, players can meet Solaire of Astora and join the Warrior of Sunlight covenant.
- Requires 25 Faith to join, but summoning or being summoned lowers the requirement.
Shortcuts
Bonfire Shortcut
- After defeating the Taurus Demon, proceed to the large bridge guarded by the Hellkite Drake.
- Lure the Drake to activate its flame attack and rush to the staircase in the center of the bridge.
- Descend the stairs and kick down the ladder to unlock a shortcut to the Undead Burg bonfire.
Hellkite Drake Bridge Bypass
- Method 1: Descend the stairs from the bridge to travel underneath it, avoiding the Hellkite Drake.
- Method 2: Use the Master Key to access the alternate route through Darkroot Basin:
- From Firelink Shrine, travel through New Londo Ruins and into the Valley of Drakes.
- Enter Darkroot Basin and proceed to the lower Undead Burg, bypassing the Drake entirely.
Watchtower Shortcut to Havel’s Tower
- Use the Watchtower Basement Key (obtained after the Moonlight Butterfly) or the Master Key to unlock the door near the spiral staircase.
- Leads to Havel the Rock and connects to Darkroot Basin.
Soul Farming
The Hellkite Drake can be used to farm souls by baiting its flame attack to burn nearby enemies. This method yields 555 souls per cycle and is a safe way to level up early.
Notes
- The bonfire near the spear Hollows is a crucial checkpoint; upgrading it early with Kindling ensures better sustainability in the area.
Trivia
- The Drake Sword’s ranged R2 attack emits a shockwave, making it effective in narrow corridors. However, the attack consumes significant durability.
- The Black Knight in Undead Burg is one of several scattered throughout Lordran, each guarding valuable items or key locations.
- The Taurus Demon’s design emphasizes vertical combat, teaching players to use the environment to their advantage.
Undead Parish
 Undead Parish (城下不死教区) is a Location in Dark Souls. It is accessible after Undead Burg, and enables access to Sen's Fortress and the Darkroot Garden.
Information
The Undead Parish is a continuation of the Undead Burg, featuring tougher enemies, a mini-boss encounter with the Armored Tusk, and a climactic fight with the Bell Gargoyles. It introduces new NPCs like the Fire Keeper and Andre of Astora, alongside key items and shortcuts that make it a critical area for progression.
Area Bosses
Mandatory
Bell Gargoyles:
- Encountered atop the church tower.
- First Gargoyle appears immediately, while a second joins when the first's health is reduced by 50%.
- Weak to fire and lightning damage.
- Rewards: Twin Humanities, 10,000 Souls, and unlocks the first bell.
- Drops: Gargoyle Tail Axe (tail), Gargoyle Helm, Gargoyle Shield, and Gargoyle Halberd.
Enemies
Hollow Soldiers and Warriors:
-
- Found throughout the Parish.
- Variants wield swords, spears, or crossbows.
- Drop: Souls, Hollow Soldier Shield, and consumables.
Balder Knights:
-
- Guard the church entrance and upper floors.
- Variants include sword and rapier users.
- Drops: Balder Side Sword, Balder Shield.
Armored Tusk (Mini-Boss):
-
- A massive, armored boar found near the church entrance.
- Vulnerable at its unarmored rear and to fire.
- Drops: Fang Boar Helm (rare).
Channeler:
-
- Located on the upper floor of the church.
- Buffs nearby enemies and uses sorceries like Soul Arrow.
- Drops: Channeler's Trident (rare).
Berenike Knight:
-
- Found on the ground floor of the church near the altar.
- Uses a large shield and deals heavy damage.
- Drops: Large Titanite Shard, Tower Shield (rare).
Hollow Soldiers (Enhanced):
-
- Buffed by the Channeler. Identified by their blue aura.
- Extremely dangerous due to increased attack power.
Merchants
Andre of Astora:
-
- Found near the bonfire in the lower tower.
- Provides weapon reinforcement, modifications, and sells smithing supplies.
- Sells:
- Crest of Artorias (20,000 Souls).
- Various weaponry and titanite shards.
Fire Keeper (Anastacia of Astora):
-
- Found at Firelink Shrine after rescuing Lautrec.
- Reinforces Estus Flasks with Fire Keeper Souls.
Oswald of Carim:
-
- Appears after ringing the first bell.
- Offers:
- Absolution for reversing hostility.
- Purging Stones to cure curses.
- Various rings and items.
NPCs
Lautrec of Carim:
-
- Imprisoned on the upper floor of the church.
- Rescue him using the Mystery Key or the Master Key.
- Rewards: Sunlight Medal after being freed.
- Potentially kills the Fire Keeper if left alive.
Solaire of Astora:
-
- Can be summoned for the Bell Gargoyle boss fight.
- His summon sign is located near the fog gate if the player is in human form.
Items
Weapons:
- Halberd: Found near the gate leading to the church.
- Gargoyle Tail Axe: Dropped by severing the tail of a Bell Gargoyle.
- Balder Side Sword: Rare drop from Balder Knights.
- Black Knight Sword: Dropped by the Black Knight near the Tusk area.
Shields:
- Knight Shield: Found near the Balder Knight with the rapier.
- Gargoyle Shield: Dropped by the Bell Gargoyles.
Armor:
- Fang Boar Helm: Rare drop from the Armored Tusk.
- Gargoyle Helm: Rare drop from the Bell Gargoyles.
Key Items:
- Fire Keeper Soul: Found on the altar in the church.
- Mystery Key: Found in the church near the Tusk area.
- Basement Key: Located near the gate to the lower Undead Burg.
Consumables:
- Gold Pine Resin: Adds lightning damage to weapons. Useful against Gargoyles.
- Soul of a Nameless Soldier: Found scattered throughout the area.
Walkthrough
Reaching the Parish
- From Undead Burg, defeat the Hellkite Drake or use the shortcut under the bridge.
- Navigate the Tusk area by luring enemies and taking advantage of fire damage for the Tusk.
Church Ground Floor
- Defeat the Balder Knights and avoid the Berenike Knight initially.
- Activate the elevator shortcut to Firelink Shrine.
Church Upper Floors
- Clear the Hollow Soldiers and Channeler while avoiding being swarmed.
- Rescue Lautrec using the Mystery Key or Master Key.
Bell Gargoyle Boss Fight
- Focus on severing the tail for the Gargoyle Tail Axe.
- Use firebombs or Gold Pine Resin to maximize damage.
Shortcuts
- Firelink Shrine Elevator:
- Found on the church's ground floor, connects directly to Firelink Shrine.
- Gate Shortcut:
- Near the Tusk area, unlocks a path back to Undead Burg.
Soul Farming
Church Exterior:
-
- Balder Knights and Hollow Soldiers provide consistent souls.
Hellkite Drake:
-
- Use its fire breath on the bridge to farm Hollow Soldiers repeatedly.
Notes
- Hollow Soldiers (Enhanced): Always prioritize killing the Channeler to disable their buff.
- Killing Lautrec early prevents him from murdering the Fire Keeper.
Trivia
- The Hellkite Dragon can be cheesed by shooting its tail from below the bridge to obtain the Drake Sword.
Darkroot Garden
 Darkroot Garden (黒い森の庭) is a Location in Dark Souls. It is reached after location, and before location.
Information
The Darkroot Garden is a dense forest located past the Undead Parish. This area is home to formidable enemies, key bosses like Moonlight Butterfly and Great Grey Wolf Sif, and significant NPCs such as Alvina the Cat and Shiva of the East. It also contains the Covenant of Forest Hunters and leads to the Darkroot Basin. Exploration requires caution, as the area includes hidden paths, ambushes, and environmental hazards.
Area Bosses
Moonlight Butterfly
- Location: Stone bridge in the Darkroot Garden.
- Drops:
- 10,000 Souls
- Watchtower Basement Key
- Divine Ember
- Strategy:
- Use ranged attacks or summon Beatrice the Witch.
- Avoid or block its magic projectiles.
- Attack when it lands on the bridge to recharge its energy.
Great Grey Wolf Sif
- Location: Behind the large glowing door in the Darkroot Garden.
- Drops:
- Soul of Sif
- Covenant of Artorias (ring)
- Strategy:
- Stay under its belly to avoid most attacks.
- Use fire-based attacks for increased damage.
Enemies
Tree Spirits
- Appearance: Resemble trees and ambush the player.
- Drops:
- Moss Clumps (Green, Purple, or Blooming)
- Strategy:
- Strike preemptively when spotted in their dormant state. Weak to Pyromancies.
- Strike preemptively when spotted in their dormant state. Weak to Pyromancies.
Great Stone Knights
- Appearance: Large, armored knights that use powerful melee and magic attacks.
- Drops:
- 600 Runes
- Stone Greatsword (2%)
- Stone Armor Set (2%)
- 600 Runes
- Strategy:
- Use ranged attacks or dodge their slow swings.
- Avoid their AoE spells.
Forest Hunter NPCs
- Includes warriors like:
- Pharis: Drops Twin Humanities, Pharis's Black Bow and Pharis's Hat.
- Clerics: Use healing miracles.
- Rogues: Attempt backstabs.
- Strategy:
- Lure one at a time to avoid being overwhelmed. There is also a rune farming method that can be used to lure them into running off a cliff and instantly dying, enabling the player to farm 1000-5000 souls per enemy.
- Lure one at a time to avoid being overwhelmed. There is also a rune farming method that can be used to lure them into running off a cliff and instantly dying, enabling the player to farm 1000-5000 souls per enemy.
Giant Cats
- Location: Found near the bridge in the Basin.
- Strategy:
- Avoid their spinning roll attack by staying near narrow passages.
Mushroom People
- Appearance: Small and large humanoid mushrooms.
- Drops:
- Gold Pine Resin
- Magic Ember (from the chest near their location)
- Strategy:
- Large Mushrooms hit hard; stay at range.
NPCs
Alvina the Cat
- Found in the stone building near the Forest Hunter area.
- Grants access to the Forest Hunter covenant.
Shiva of the East
- Appears after joining the Forest Hunters.
- Moves to Blighttown later in the game.
- Drops:
- Murakumo (if killed)
Witch Beatrice
- Summon sign is located beneath the staircase before the Moonlight Butterfly boss fog.
- Assists with magic attacks.
Items
Key Items
- Seal of Artorias:
- Sold by Andre for 20,000 Souls to open the Seal in the Darkroot Garden.
Armor
- Stone Armor Set:
- Found near the entrance to Sif’s area.
Rings
- Wolf Ring:
- Found past a hidden path near the Moonlight Butterfly route.
- Increases Poise by 40.
Weapons
- Pharis's Black Bow:
- Dropped by Pharis in the Forest Hunter area.
Upgrades
- Divine Ember:
- Found after defeating the Moonlight Butterfly.
Walkthrough
From Undead Parish
- Exit through Andre's smithy.
- Bypass or kill the Titanite Demon.
- Navigate the forest path and defeat the Tree Spirits.
- Unlock the Seal of Artorias door using 20,000 Souls from Andre.
- Use the hidden bonfire near the door to rest.
To Moonlight Butterfly
- Take the side path past the Seal of Artorias.
- Summon Beatrice for assistance.
- Fight the Moonlight Butterfly on the bridge.
- Collect the Divine Ember and Watchtower Basement Key from the rooftop.
To Sif
- Enter the glowing door in the forest after defeating the Butterfly.
- Approach the grave to initiate the boss fight.
- Collect the Covenant of Artorias upon defeating Sif.
Covenants
Forest Hunter Covenant
- Leader: Alvina the Cat.
- Location: Inside the stone structure near the hidden bonfire.
- How to Join:
- Speak with Alvina and answer "Yes" to her questions.
- Benefits:
- Forest Hunter NPCs become non-hostile.
- Grants the Cat Covenant Ring, which summons the player to invade trespassers.
- Penalties:
- Attacking Forest Hunter NPCs or allies will result in being branded a traitor. Use absolution from Oswald of Carim to rejoin.
Shortcuts
Hidden Bonfire:
-
- Found near the Seal of Artorias. Attack the wall on the left of the sealed door to reveal it.
Alternate Path to Sif:
-
- Bypass the Seal of Artorias by traveling through the Basin.
Soul Farming
Forest Hunters:
-
- After opening the Seal of Artorias, bait Forest Hunter NPCs to the ledge and force them to fall for easy Souls.
Stone Knights:
-
- Farm near the bonfire in the forest for consistent Souls and armor drops.
Notes
- Defeating the area bosses (Moonlight Butterfly and Sif) affects multiplayer invasions in the area.
- The Cat Covenant Ring summons players to defend the forest.
Trivia
- Sif’s relationship with Artorias is central to the game’s lore. His appearance changes slightly when encountered after the DLC.
- The Forest Hunters’ half-visible aesthetic is meant to evoke the ghostly atmosphere of the cursed forest.
Darkroot Basin
 Darkroot Basin (狭間の森) is a Location in Dark Souls. It is reached after location, and before location.
Information
Area Bosses
Mandatory
Optional
Enemies
Merchants
this area has these merchants
NPCs
this area has these NPCs
Items
this area spawns these items
Walkthrough
Covenants
Quests
Shortcuts
Soul Farming
Notes
Trivia
Lower Undead Burg
 Lower Undead Burg (不死街下層) is a Location in Dark Souls. It is accessible via Undead Parish and leads to the Depths.
Information
The Lower Undead Burg is a claustrophobic and perilous area connected to the Undead Parish and the Depths, accessed via the door near the Helkite Dragon's bridge. The area is filled with ambushes, tight corridors, and formidable foes, culminating in the Capra Demon boss battle. It also features notable NPCs and key items necessary for progression.
Area Bosses
Mandatory
Capra Demon
- Found at the end of the residential area.
- Accompanied by two Hollow Dogs.
- Drops:
- Key to the Depths
- Demon Great Machete (rare drop).
Enemies
Hollow Dogs:
-
- Found near the burning pyre.
- Attack rapidly with high-speed lunges and inflict bleed damage.
- Drops: Souls.
Hollow Thieves:
-
- Found throughout the residential area, often in ambush positions.
- Attack with daggers and throwable poison knives.
- Drops:
- Thief’s Dagger
- Target Shield
- Hollow Thief’s Hood
- Hollow Thief’s Armor
Torch Hollows:
-
- Found near the area with Griggs’ imprisonment.
- Attack with flaming weapons that deal high damage at close range.
- Drops: Souls.
Merchants
Female Undead Merchant:
- Found in the aqueduct near the shortcut to Firelink Shrine.
- Sells:
- Poison Throwing Knives
- Transient Curse
- Various consumables and items.
NPCs
Griggs of Vinheim:
- Found locked in a house near the area with the Torch Hollows.
- Requires the Residence Key to rescue.
- After rescue, moves to Firelink Shrine, selling sorceries and magical equipment.
Items
Weapons:
- Mail Breaker: Found near the residential area.
- Target Shield: Dropped by Hollow Thieves or found in the residential buildings.
- Sorcerer’s Catalyst: Found in the same room full of barrels as Griggs of Vinheim.
Armor:
- Thief Set: Found in a house in the residential area.
- Sorcerer Set: Found near Griggs of Vinheim’s location.
Consumables:
- Humanity Twin: Found near the Torch Hollow area.
- Large Soul of a Nameless Soldier: Found near the residential area.
Key Items:
- Key to the Depths: Dropped by the Capra Demon, granting access to the Depths.
- Residence Key: Purchased from the Undead Merchant in the Undead Burg, required to rescue Griggs.
Walkthrough
Accessing the Lower Undead Burg
- Use the Key to the Lower Undead Burg obtained from defeating the Capra Demon to unlock the door near the Helkite Dragon’s bridge.
- Descend the long ladder and proceed through the narrow alleys.
Ambush by Hollow Dogs
- Upon approaching the burning pyre, you’ll be attacked by three Hollow Dogs.
- Use a shield to block their initial charge and counterattack carefully to avoid bleed damage.
Rescuing Griggs
- After dealing with the Hollow Dogs, head left toward the residential area.
- Use the Residence Key to unlock the door and rescue Griggs.
- Destroy barrels around him carefully to avoid accidental damage.
- Collect the Sorcerer Set and Sorcerer’s Catalyst from the room.
Facing Hollow Thieves
- Proceed into the residential area, where Hollow Thieves will ambush you from doorways.
- Use long-range weapons or attack through the doors with spears to reduce their numbers before entering.
- Beware of their parrying stance.
Capra Demon Boss Battle
- Prepare by clearing the shortcut to Firelink Shrine via the aqueduct.
- Enter the fog gate to face the Capra Demon.
- Strategy:
- Eliminate the Hollow Dogs immediately to create space and significantly slow down the pace of this encounter.
- Climb the stairs to the side and use plunging attacks to deal damage.
- Block or dodge its sweeping attacks carefully.
Shortcuts
Firelink Shrine Shortcut:
- Before the Capra Demon, descend the stairs near the boss fog.
- Proceed through the aqueduct to unlock a door leading back to the Firelink Shrine area.
Soul Farming
Hollow Dogs:
-
- Decent for farming early-game Souls, though risky due to their bleed damage.
Hollow Thieves:
-
- Often drop armor pieces and weapons that can be sold for additional Souls.
Notes
- The Key to the Depths is needed to access the next area after defeating the Capra Demon.
- Be cautious of ganks from Hollow Thieves; their poison knives can deal significant damage over time.
- Use the shortcut to Firelink Shrine to minimize the runback to the Capra Demon.
Trivia
- The Capra Demon is one of the first bosses where the arena’s size heavily influences the difficulty of the fight.
- The Female Undead Merchant has unique dialogue if attacked, including a curse-like chant.
- Rescuing Griggs early allows access to powerful sorceries and magic upgrades for spellcasters.
Depths
 The Depths (最下層) is a Location in Dark Souls. It is accessed via Lower Undead Burg, and leads to Blighttown.
Information
The Depths is a dimly lit and treacherous area beneath the Undead Burg, filled with labyrinthine corridors, ambushes, and enemies with devastating effects. This area leads to Blighttown and is home to the Gaping Dragon, one of the game's more challenging early bosses. Be prepared with repair items, such as Repair Powder, to counteract the durability damage caused by the Gaping Dragon.
Area Bosses
Mandatory
Gaping Dragon:
- A massive, deformed dragon that deals heavy damage and reduces equipment durability with its acid attacks.
- Drops:
- Blighttown Key
- Dragon King Greataxe (by cutting off its tail).
Enemies
Hollows:
-
- Common enemies found throughout the area.
- Some are armed with torches, which can deal significant fire damage.
Hollow Cooks:
-
- Found in the kitchen areas, often ambushing players from above.
- Attack with cleavers and are accompanied by dogs.
Hollow Dogs:
-
- Found near the kitchen and waterlogged areas.
- Fast-moving enemies that inflict bleed.
Rats:
-
- Found in various sizes, from small to giant.
- Inflict poison and drop Humanity.
- Giant Rats have higher health and can be exploited using ranged attacks through grates.
Basilisks:
-
- Found in the lower areas of the Depths.
- Release a curse-inducing mist that instantly kills and halves the player’s health upon death.
Slimes:
-
- Found on ceilings in the waterlogged corridors.
- Resistant to physical damage but weak to fire.
- Drop large and green titanite shards.
Kirk, Knight of Thorns (Invader):
-
- Appears if you are in human form while exploring the lower waterlogged areas.
- Drops the Spiked Shield and Barbed Straight Sword upon defeat.
Merchants
Female Undead Merchant:
- Found near the shortcut to Firelink Shrine.
- Sells:
- Poison Moss
- Blooming Purple Moss Clump
- Various consumables.
Domhnall of Zena:
- Found near the exit to Blighttown.
- Sells rare items, including the Crystal Set and Gold Pine Resin.
NPCs
Laurentius of the Great Swamp:
- Found trapped in a barrel near the kitchen.
- Roll to free him without attacking to avoid hostility.
- Moves to Firelink Shrine and offers pyromancies for sale.
Items
Key Items:
- Large Ember: Found in the kitchen area, used to upgrade weapons to +10.
- Blighttown Key: Dropped by the Gaping Dragon, unlocking the entrance to Blighttown.
Weapons and Armor:
- Spider Shield: Found in the Giant Rat's room.
- Dragon King Greataxe: Dropped by severing the Gaping Dragon's tail.
- Heavy Crossbow and Bolts: Found near the boss fog gate.
Rings:
- Evil Eye Ring: Found in the Basilisk’s lair, restores HP upon enemy kills.
Consumables:
- Humanity: Dropped by rats and found throughout the Depths.
- Repair Powder: Essential for countering the Gaping Dragon's acid attacks.
Walkthrough
Entry Point
- Use the Key to the Depths obtained from the Capra Demon to unlock the door leading into the Depths.
- Be cautious of ambushes from Hollows and Hollow Dogs.
Kitchen Area
- Deal with the Hollow Dogs first before engaging the Hollow Cook.
- Open the nearby treasure chest to obtain the Large Ember.
- Destroy the wooden crates to reveal a shortcut leading to the Giant Rat’s room.
Saving Laurentius
- From the kitchen, proceed to the waterlogged section.
- Free Laurentius from the barrel trap and defeat nearby enemies.
- He will relocate to Firelink Shrine and sell pyromancies.
Waterlogged Corridors
- Beware of Slimes clinging to the ceiling; use fire to dispatch them.
- Progress through the long corridor, avoiding ambushes from Slimes and rats.
- Obtain the Sewer Chamber Key from a corpse to unlock the nearby bonfire.
Giant Rat Room
- Use the shortcut from the kitchen to ambush the Giant Rat.
- Alternatively, shoot it through the grate using ranged weapons.
- Defeat it to obtain Humanity and loot the Spider Shield.
Basilisk Nest
- Descend into the lower levels, avoiding the curse-inducing gas of the Basilisks.
- Collect the Evil Eye Ring and other items while navigating the area.
Gaping Dragon
- Use the Sewer Chamber Key to unlock the door leading to the boss fog gate.
- Prepare by equipping items and armor resistant to acid.
- Strategy:
- Focus on staying near its hind legs.
- Avoid its acid breath attacks, which can destroy equipment.
- Sever its tail to obtain the Dragon King Greataxe.
Shortcuts
Kitchen Shortcut:
-
- Leads from the cooking area to the Giant Rat's room.
Firelink Shrine Shortcut:
-
- Unlocks access to the Female Undead Merchant near the aqueduct.
Soul Farming
Rats:
-
- Drop Humanity, useful for co-op and farming.
Slimes:
-
- Drop titanite shards, valuable for weapon upgrades.
Notes
- Basilisks’ curse mist can easily overwhelm players. Use ranged attacks to deal with them safely.
- The Gaping Dragon’s acid attacks drastically reduce equipment durability. Carry Repair Powder or visit a blacksmith afterward.
Trivia
- The Gaping Dragon's design is inspired by gluttony, as it features a grotesque mouth on its chest.
- The Depths serve as a turning point in the game, transitioning from undead-themed areas to the toxic and swampy Blighttown.
- Kirk, Knight of Thorns, invades in multiple locations and is associated with the Darkwraith covenant.
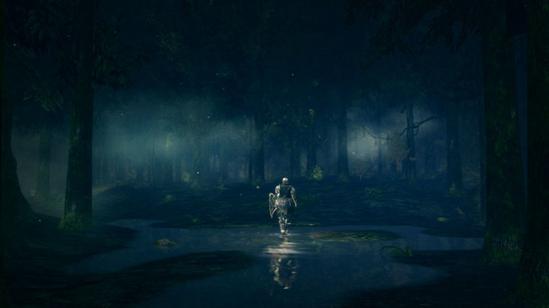
Blighttown
 Blighttown (病み村) is a Location in Dark Souls. It is accessible via Firelink Shrine and in close proximity to Valley of the Drakes, leading to Quelaag's Domain.
Information
Blighttown is a treacherous area characterized by narrow walkways, toxic threats, and high chances of falling to death. Its design and atmosphere evoke memories of "Valley of Defilement" from Demon’s Souls. Despite the danger, the rewards are significant for those who explore carefully.
Preparation
- Anti-Toxin Supplies: Bring Purple Moss Clumps and Blooming Purple Moss Clumps to counteract poison and toxic effects. Obtainable from:
- Undead Female Merchant in Undead Burg.
- Drops from Ents in Darkroot Garden.
- Spider Shield: Excellent for blocking toxic blow darts.
- Starting equipment for the Bandit class.
- Found in The Depths.
Area Bosses
Mandatory
Chaos Witch Quelaag:
Found in Quelaag’s Domain, past the swamp.
- Attacks:
- Flame Sword Combos: Slash, thrust.
- Lava Spew: Leaves damaging pools on the ground.
- Shockwave: A wide AoE attack.
- Strategy: Stay close to her spider's sides, avoid standing directly in front of her, and attack during lava-spewing animations.
- Drops:
- Twin Humanities
- Soul of Quelaag
Enemies
Standard Enemies
Blowdart Sniper
Uses toxic darts. Does not respawn.
-
- Drops:
- Toxic Dart Ammo (rare)
- Drops:
Large Club-Wielding Barbarians
Aggressive, heavy hitters.
-
- Drops:
- Large Club
- Dung Pie
- Drops:
Infested Ghouls
Poisonous enemies scattered throughout.
-
- Drops:
- Purple Moss Clump
- Drops:
Infested Fire Dogs
Flame-spewing, high-damage enemies.
Mosquitoes
Infinite respawns, easy to ignore if possible.
Leeches
Found in swamp areas.
-
- Drops:
- Large Titanite Shard
- Green Titanite Shard (x5 per drop)
- Drops:
Unique Enemies
Dragon Zombie
-
- Location: Swamp outskirts.
- Drops:
- Dragon Scale (guaranteed)
- Large Soul of a Brave Warrior
Egg Carrier
Passive unless provoked.
-
- Drops:
- Egg Vermifuge (when killed)
- Drops:
Merchants
Quelana of Izalith:
-
- Appears in the swamp once Pyromancy Flame is +10 or higher.
- Sells powerful pyromancies, including Firestorm and Chaos Fireball.
Shiva of the East:
-
- Moves to the swamp after joining Forest Hunter covenant.
- Sells unique weapons and rings.
NPCs
Quelana of Izalith:
- Pyromancy master found near the swamp's edge.
Shiva of the East:
- Weapon merchant in the swamp after meeting in Darkroot Garden.
Maneater Mildred:
- Invades in the swamp, can be summoned for the Quelaag fight.
Items
Weapons
- Iaito: Found in The Depths route by jumping onto a ledge.
- Great Club: Located near the swamp giants.
- Whip: Near the fog gate, requires a leap from an adjacent platform.
- Butcher Knife: Dropped by Maneater Mildred.
Shields
- Eagle Shield: Found near a ledge past the first bonfire.
Armor
- Shadow Set: Found near the second bonfire, accessible via a swinging bridge.
- Wanderer Set: Found near the swamp.
Rings
- Poisonbite Ring: Reduces poison buildup, invaluable for the area.
- Red Tearstone Ring: Found in Valley of Drakes, ideal for low-health strategies.
Consumables
- Purple Moss Clump: Dropped by enemies.
- Blooming Purple Moss Clump: Best for curing toxic effects.
- Dung Pie: Causes toxic buildup on enemies, risky to use.
Key Items
- Fire Keeper Soul: Found in the upper levels, guarded by Blowdart Snipers and Fire Dogs.
- New Londo Ruins Key: Found near the swamp giants.
Walkthrough
From The Depths
- Descend carefully through ladders while avoiding toxic and falling hazards.
- Take the right path to avoid excessive enemy encounters.
- Beware of holes in the wooden walkways.
From Valley of Drakes
- Descend ladders and enter the swamp.
- Collect items and find the bonfire near the waterwheel.
Reaching Quelaag’s Domain
Covenants
Quests
Shortcuts
- Master Key Route: Allows access from Valley of Drakes.
- Swamp Bonfire: Found near the waterwheel, provides a vital checkpoint.
Soul Farming
Leeches
Drop multiple Green Titanite Shards and Large Titanite Shards.
- Recommended farming spot: Near the swamp bonfire.
Notes
- Equip the Rusty Iron Ring to move freely in the swamp.
- Avoid fighting large groups in narrow areas.
Trivia
- The design of Blighttown draws heavily from the "Valley of Defilement" in Demon’s Souls.
- Maneater Mildred is a reference to Maneater, the infamous boss from Demon’s Souls.
Valley of the Drakes
 Valley of the Drakes (飛竜の谷) is a Location in Dark Souls.
Information
Valley of the Drakes serves as a connecting area between New Londo Ruins, Blighttown, and Darkroot Garden. The area is narrow and requires caution to avoid falling to your death.
Enemies
Lightning Drakes
- Description: Small, blue dragons that breathe lightning.
- Attacks:
- Bite: Close-range melee attack.
- Sweeping Lightning Breath: Wide, sweeping lightning attack.
- Straight Lightning Breath: Long-range, linear lightning attack.
- Aerial Lightning Breath: Used while flying.
- Weaknesses:
- Poison: Can be safely poisoned from a distance with poison arrows.
- Bleed: Effective due to their susceptibility to bleed buildup.
- Drops:
- Dragon Scale (Low drop rate).
Dragon Zombie
- Description: A massive undead dragon found near Blighttown's edge. Does not respawn after being defeated.
- Attacks:
- Poison Breath: Wide-area attack, slow but deadly.
- Arm Swipes: Close-range melee attacks.
- Weaknesses:
- Poison Breath is slow, leaving openings for ranged attacks.
- Safe spot: Climb the narrow ledge near the Blighttown entrance for a vantage point.
- Drops:
- Dragon Scale (Guaranteed drop).
Items
Weapons
- Astra Straight Sword: Found near the right hand of the Dragon Zombie. Can be acquired without defeating the enemy, though it is risky.
- Beatrice's Catalyst: Found after defeating the Four Kings in the direction of the bridge to the Valley of Drakes.
Shields
- Dragon Crest Shield: Found near the right hand of the Dragon Zombie. Accessible with or without engaging the enemy.
- Spider Shield: Located on the bridge occupied by a drake.
Armor
- Bandit Set: Found alongside the Spider Shield on the bridge with the drake.
- Witch Set: Appears along with Beatrice's Catalyst after defeating the Four Kings and heading towards the Valley of Drakes.
Rings
- Red Tearstone Ring: Located near the three drakes, atop a long ladder near the large gate.
Consumables
- Humanity: Found near one of the drakes along the cliffside path.
- Soul of a Brave Warrior: Found near the Dragon Zombie's left hand. Retrievable without combat, though it may require sacrificing a life.
- Large Soul of a Nameless Soldier: Found near the iron door leading to New Londo Ruins, closer to the Blighttown side.
Key Items
- New Londo Ruins Key: Required to access certain shortcuts, such as the connection between New Londo and the Valley of Drakes.
Walkthrough
From Darkroot Garden
- Use the elevator behind the bonfire cave to enter Flying Dragon Valley.
- Encounter the first Lightning Drake immediately after arriving.
- Continue across the bridge to face another Lightning Drake. Three more wait further in.
- Avoid engaging multiple drakes at once; lure and fight them one at a time.
- Ignore the large gate leading to New Londo Ruins as it cannot be opened from this side.
- Cross the bridge or head left to encounter the Dragon Zombie and progress toward Blighttown or New Londo Ruins.
From Blighttown
- Exit the elevator and continue upward to reach the opposite side of Flying Dragon Valley.
- Encounter a Lightning Drake and the Dragon Zombie near the cliff path.
- Proceed straight to find the iron door to New Londo Ruins (requires the Master Key or New Londo Ruins Key).
- The treasure near the Dragon Zombie includes Astora’s Straight Sword and Dragon Crest Shield.
From New Londo Ruins
- Enter through either of two routes:
- Firelink Shrine-side Door: Requires Master Key or New Londo Ruins Key.
- Watergate: Opens after using the Seal Key to drain New Londo.
- For the Firelink Shrine-side Door, proceed through the cliffs to encounter the Dragon Zombie and reach the Blighttown path.
- For the Watergate, advance toward Darkroot Garden while defeating Lightning Drakes.
Shortcuts
None explicitly present, but the Master Key unlocks the door between New Londo Ruins and Flying Dragon Valley, providing early access.
Soul Farming
Lightning Drakes:
- Each Drake provides a moderate amount of souls.
- Repeatedly lure and defeat the three drakes near the large gate for a safe farming loop.
- Use ranged attacks like poison arrows for a safer approach.
Notes
- Falling hazards are a constant threat due to the narrow pathways.
- Poison arrows are highly effective against both Lightning Drakes and the Dragon Zombie.
- The Dragon Crest Shield and Astora’s Straight Sword are valuable early-game items for players seeking good elemental resistances and Divine weapon properties.
Trivia
- The Dragon Zombie is one of the few unique enemies that doesn’t respawn after being killed.
- The Red Tearstone Ring found in this area is one of the most useful rings for high-risk players, providing increased attack power at low health.
Sen's Fortress
 Sen's Fortress (センの古城) is a Location in Dark Souls. It is accessible via Undead Parish or Blighttown, and leads to Anor Londo.
Information
Sen's Fortress, accessible after ringing the Bells of Awakening in the Undead Parish and Blighttown, is a perilous stronghold filled with traps, tough enemies, and treacherous paths. The area introduces mechanical traps such as swinging blades, rolling boulders, and pressure plates that trigger arrows. Successfully navigating the fortress rewards the player with access to the fortress's boss, the Iron Golem, and opens the path to Anor Londo.
Area Bosses
Mandatory
Iron Golem
- A towering giant with powerful melee attacks and the ability to throw players off the battlefield.
- Strategy:
- Stick to the golem’s legs, focusing on one to stagger him.
- Use the environment to avoid being knocked off.
- If summoned, Black Iron Tarkus can solo the fight effectively.
Enemies
Snake Warriors (Snake-Men)
- Description: Armed with a shield and a large sword. Found throughout the fortress.
- Attacks:
- Close-range: Stab, sweep, and overhead slam attacks.
- Long-range: Jumping attack to close distance.
- Grapple: A close-range grab attack that deals significant damage.
- Weaknesses: Vulnerable to backstabs and staggerable with heavy weapons.
- Drops:
- Man-Serpent Greatsword: Rare drop.
- Large Titanite Shard: Common drop.
- Snake Shield: Very rare drop.
Snake Sorcerers (Snake-Mages)
- Description: Use lightning-based magic and wield a four-armed weapon called Flamberge.
- Attacks:
- Close-range: Rapid multi-hit attacks with Flamberge, inflicting bleed buildup.
- Long-range: Lightning magic projectiles.
- Grapple: A close-range grab similar to Snake Warriors.
- Weaknesses: Vulnerable to backstabs and staggerable with heavy attacks.
- Drops:
- Flamberge: Rare drop.
- Green Titanite Shard: Uncommon drop.
Mimics
- Description: Disguised as treasure chests, these creatures ambush players who interact with them.
- Attacks:
- Melee: Punches, kicks, and powerful slam attacks.
- Grapple: A deadly grab attack if the player interacts with them.
- Weaknesses: Use Lloyd's Talisman to put them to sleep and safely retrieve items.
- Drops:
- Lightning Spear (specific mimic near the elevator).
- Symbol of Avarice: Rare drop when killed or after multiple uses of Lloyd's Talisman.
- Occult Club: Specific mimic in the fortress.
Titanite Demons
- Description: Found in the lower area of the fortress, on a tar-covered floor.
- Attacks:
- Close-range: Sweeping attacks with their Titanite Catch Pole.
- Long-range: Lightning projectiles.
- Weaknesses: Use ranged attacks or mobility-enhancing items like Rusted Iron Ring to counter slow movement in tar.
- Drops:
- Titanite Catch Pole: Rare drop.
- Demon Titanite: Guaranteed drop.
Boulder-Throwing Giants
- Description: Large enemies that drop boulders into Sen's Fortress.
- Attacks:
- Boulder Throw: Rolls boulders down paths, setting off traps.
- Slam: Close-range attack if approached.
- Weaknesses: Vulnerable to poison or ranged attacks from safe locations.
- Drops:
- Titanite Chunk: Uncommon drop.
- Titanite Slab: Rare drop.
Bomb-Throwing Giant
- Description: Positioned at the rooftop of Sen's Fortress, this giant throws large bombs.
- Attacks:
- Bomb Throw: Creates a large explosion, dealing high fire damage.
- Weaknesses: Approach and defeat to stop bombs during the boss fight.
- Drops:
- Titanite Chunk: Uncommon drop.
- Titanite Slab: Rare drop.
Balder Knights
- Description: Elite warriors using swords and shields. Found in various locations within the fortress.
- Attacks:
- Sword strikes with parry and riposte capability.
- Shield bash to stagger.
- Weaknesses: Parrying their attacks is highly effective.
- Drops:
- Balder Shield: Uncommon drop.
- Balder Side Sword: Rare drop.
- Large Titanite Shard: Common drop.
Chaos Witch Quelaag (Summoned Enemy)
- Description: Only appears as part of the Iron Golem boss fight when summoned by players during multiplayer invasions.
- Drops:
- None.
Merchants
Crestfallen Merchant
- Location: Found on a ledge accessible by jumping across a broken bridge.
- Sells:
- Unique items such as Green Blossom, Large Titanite Shards, and the Greatsword.
- The Cage Key, which opens the shortcut elevators.
NPCs
Siegmeyer of Catarina
- Found near the rolling boulder trap, pondering how to proceed.
- Progress his event by redirecting the boulders to clear his path.
Big Hat Logan
- Found imprisoned in a cage in a hidden area. Use the Cage Key or Master Key to rescue him.
Items
Key Items
- Cage Key: Opens the shortcut elevator and Logan’s cage, sold by the Crestfallen Merchant.
- Lightning Spear: Found in the mimic chest in the elevator room.
- Iron Ring of Protection: Found in a chest near the first boulder trap.
Other Items
- Gold Serpent Ring: Increases item discovery, located in a hidden room opened by redirecting boulders.
- Green Titanite Shard: Dropped by Titanite Demons in the lower levels.
Walkthrough
Entrance to the First Guillotine Corridor
- Enter through the gate opened after ringing both bells.
- Beware of the arrow trap triggered by stepping on the pressure plate. You can lure enemies into the trap to damage them.
- Defeat the two Serpent Soldiers and continue forward to reach the first swinging guillotine corridor.
First Guillotine Corridor
- Carefully time your movements to pass through the blades.
- Eliminate the Serpent Mage on the upper platform with ranged attacks if possible.
- Crossing this corridor leads to a room with more Serpent Soldiers and a branching path.
Boulder Trap and Hidden Paths
Midpoint and Second Guillotine Corridor
- Cross the second guillotine corridor. This area has narrower paths and more swinging blades.
- Climb up to the rooftop where a Giant throws firebombs. Either evade his attacks or ascend to the top to kill him.
- Drop down to a ledge for a shortcut cage elevator, which connects the fortress's entrance to the rooftop.
Roof and Final Area
Shortcuts
Cage Elevator:
- Found near the rooftop; provides quick access to the fortress entrance.
Soul Farming
- The Serpent Soldiers and Mages drop a good amount of souls and can be farmed efficiently.
- Titanite Demons in the lower levels drop valuable upgrade materials.
Notes
- Many traps can be used to your advantage by luring enemies into them.
- Falling off ledges or being hit by traps often results in instant death.
- The mimic’s Lightning Spear is a powerful weapon for early stages in the game.
Trivia
- Iron Tarkus, summonable for the boss fight, is infamous for being able to solo the Iron Golem due to his high durability and damage.
Anor Londo
 Anor Londo (アノール・ロンド) is a Location in Dark Souls. It is accessible after Sen's Fortress, and unlocks the Painted World of Ariamis if the player has the Peculiar Doll in their possession.
Information
Anor Londo is a pivotal mid-game area in Dark Souls. Known for its grandeur, it serves as the seat of the gods and the location of the infamous boss fight against Ornstein and Smough. This area features challenging enemies, intricate shortcuts, and significant lore-related events. Access to Anor Londo is granted after defeating the boss of Sen's Fortress and being carried by the Batwing Demons.
Area Bosses
Mandatory
Ornstein and Smough
- Location: Grand Cathedral.
- Drops:
- Soul of Ornstein (if Smough is killed second).
- Soul of Smough (if Ornstein is killed second).
- Strategy:
- Use pillars to separate the bosses.
- Defeat Ornstein first for a more manageable Smough.
- Avoid Smough’s AoE attacks when enhanced.
Optional
Dark Sun Gwyndolin
- Location: Darkmoon Tomb.
- Drops:
- Soul of Gwyndolin.
- Unlocks Miracle: Sunlight Blade.
- Strategy:
- Use obstacles to block ranged attacks.
- Dash forward to close the gap and attack during spell cooldowns.
Enemies
Batwing Demons:
-
- Weak to ranged attacks and poison.
- Vulnerable to falling off ledges due to narrow platforms.
Silver Knights:
-
- Found throughout the castle.
- Use parries and backstabs for efficient takedowns.
- Guard the Greatbow archers.
Giant Sentinels:
-
- Found at the main gates and in the cathedral.
- Use hit-and-run tactics and avoid their wide AoE attacks.
Mimics:
-
- Attack treasure chests to confirm identity or use Lloyd’s Talismans to retrieve items safely.
- Drops:
- Symbol of Avarice (rare drop).
- Various loot, including Gold Coins and Silver Coins.
Painting Guardians:
-
- Agile foes found in the rafters.
- Use ranged attacks to lure them out one by one.
Merchants
Giant Blacksmith
- Location: Inside the cathedral near the main hall.
- Services:
- Weapon ascension for boss weapons.
- Sells:
- Twinkling Titanite
- Giant’s Halberd
- Greatbows and Greatarrows.
Items
Key Items
-
Lordvessel:
- Received from Gwynevere after defeating Ornstein and Smough.
- Allows fast travel between bonfires.
-
Darkmoon Seance Ring:
- Found in the Catacombs.
- Grants access to Gwyndolin’s tomb.
Rings
-
Hawk Ring:
- Found in a chest behind the Giant Blacksmith.
- Increases the range of bows.
-
Sunlight Blade Ring:
- Found near the Darkmoon Tomb.
Armor
-
Black Iron Set:
- Found near the Painted World entrance.
-
Silver Knight Set:
- Found in treasure chests guarded by Silver Knights.
-
Havel’s Set:
- Hidden in a secret room behind a fireplace.
Weapons
-
Dragon Slayer Greatbow:
- Found on the castle’s outer walls.
-
Crystal Halberd:
- Dropped by a Mimic near the first bonfire.
Miscellaneous
- Demon Titanite:
- Found in treasure chests or dropped by Titanite Demons.
- Coins (Gold, Silver, Bronze):
- Dropped by Mimics and used to trade with Kingseeker Frampt.
Walkthrough
Arrival
- Speak to the Batwing Demon to leave Anor Londo or explore further.
- Access the first bonfire guarded by the Firekeeper. Strengthen Estus Flasks here.
Cathedral and Ornstein/Smough
- Traverse the rooftops and deal with the Painting Guardians.
- Open the bridge shortcut to the Grand Cathedral.
- Defeat Ornstein and Smough to progress to Gwynevere’s chamber.
Painted World of Ariamis Access
- Bring the Strange Doll from the Asylum to the Painted World entrance.
- Beware of the Painting Guardians in this area.
Darkmoon Tomb
- Equip the Darkmoon Seance Ring to open Gwyndolin’s tomb.
- Choose to either fight Gwyndolin or join the covenant.
Covenants
Princess Guard
- Leader: Gwynevere, Princess of Sunlight.
- Location: Gwynevere’s chamber after defeating Ornstein and Smough.
- How to Join:
- Kneel before Gwynevere to pledge allegiance.
- Benefits:
- Gain access to healing miracles: Soothing Sunlight and Bountiful Sunlight.
- Notes:
- Killing Gwynevere ends the covenant and permanently alters Anor Londo.
Blades of the Darkmoon
- Leader: Gwyndolin, the Dark Sun.
- Location: Behind the illusory statue near the Darkmoon Tomb bonfire.
- How to Join:
- Equip the Darkmoon Seance Ring and kneel at the altar.
- Benefits:
- Access to the miracle Darkmoon Blade.
- Invade and punish the guilty.
Shortcuts
Cathedral Bridge:
-
- Operated via lever to provide direct access to the Grand Cathedral.
Golden Gate:
-
- Opens after defeating Ornstein and Smough, granting access to Gwynevere.
Soul Farming
- Silver Knights:
- Found in the hallways leading to the Grand Cathedral.
- Provide substantial Souls and can be farmed efficiently with sufficient levels.
- Painting Guardians:
- Easy to farm due to their low health and frequent spawns.
Notes
- Killing Gwynevere triggers permanent nighttime in Anor Londo, altering enemy placements and removing several NPCs.
- The Giant Blacksmith remains unaffected by these changes.
Trivia
- The Batwing Demons carry players to Anor Londo, symbolizing the transition to the gods' domain.
- Gwyndolin is the only remaining deity in Anor Londo after Gwynevere’s departure.
Demon Ruins
 Demon Ruins (デーモン遺跡) is a Location in Dark Souls. It is accessible after Blighttown and Quelaag's domain, and can be used as a shortcut to Lost Izalith.
Information
Demon Ruins is a fiery area connected to Quelaag's Domain. It houses three formidable bosses: Ceaseless Discharge, Demon Firesage, and Centipede Demon. Progressing through this area requires the defeat of Ceaseless Discharge, which lowers the lava levels, allowing access to deeper sections. The Demon Firesage and Centipede Demon require breaking the Lordvessel Seal to fight.
Area Bosses
Ceaseless Discharge
- Found shortly after entering the Demon Ruins.
- Drops 20,000 Souls, Humanity, a Homeward Bone and the Gold-Hemmed Black Set. Opens access to the lower areas by solidifying the lava.
Demon Firesage
- Found in a building deeper in the ruins.
- Drops 20,000 Souls, 1 Humanity and the Demon's Catalyst.
Centipede Demon
- Found near the bottom of the ruins.
- Drops 40,000 Souls, 1 Humanity, 1 Homeward Bone, and the Orange Charred Ring, which reduces lava damage.
- Tail Drop: Cutting off its tail grants the Orange Charred Ring without needing to defeat the boss.
Enemies
Egg-Burdened
- Found along the slopes leading down from the first bonfire.
- Passive unless provoked, but two will attack aggressively.
- Drops:
- Egg Vermifuge
- Hazards:
- Killing them spawns five larvae, which deal significant damage if they swarm you.
- Grab attack can infect you with the Egghead status.
Taurus Demons
- Found in the large lava field after defeating Ceaseless Discharge.
- Drops:
- Demon's Great Axe
- Strategy:
- Use a bow to lure them one by one.
- Do not engage in groups.
- Permanently defeated upon death.
Capra Demons
- Found deeper within the ruins, guarding pathways and treasures.
- Drops:
- Demon's Great Machete
- Strategy:
- Bait them into open areas and defeat them one at a time.
- Poison arrows are highly effective.
Burrowing Rockworm
- Found in confined areas, capable of ambushing players.
- Hazards:
- Acid spray reduces weapon durability.
- Grab attack can deal massive damage.
- Drops:
- Green Titanite Shard
- Red Titanite Chunk
Stone Statues
- Found near the Demon Firesage boss.
- Passive until approached, where they use explosive fire attacks.
Items
Weapons
- Demon's Catalyst:
- Dropped by Demon Firesage.
Armor
- Gold-Hemmed Black Set:
- Found near Ceaseless Discharge. Picking it up triggers the boss fight.
Consumables
- Egg Vermifuge:
- Dropped by Egg-Burdened enemies.
Titanite
- Green Titanite Shard:
- Dropped by Burrowing Rockworms.
- Red Titanite Chunk:
- Dropped by Burrowing Rockworms.
Key Items
- Large Flame Ember:
- Found in the lower ruins, past several Burrowing Rockworms and Taurus Demons.
Walkthrough
Entry and First Bonfire
- Access the Demon Ruins via Quelaag's Domain.
- The first bonfire is just inside the ruins.
Ceaseless Discharge
- Proceed down the slope past passive Egg-Burdened enemies.
- Collect the Gold-Hemmed Black Set to trigger the fight.
- Defeat Ceaseless Discharge to lower the lava levels.
Lava Field and Taurus Demons
- Cross the newly accessible lava field, avoiding groups of Taurus Demons.
- The Chaos Flame Ember can be found in the lava, but requires the Orange Charred Ring for safety.
Second Bonfire and Capra Demons
- Enter the building beyond the lava field to find a second bonfire.
- Deal with Capra Demons using ranged attacks or by baiting them to safe zones.
Demon Firesage
- Progress deeper into the ruins to find the Demon Firesage.
- Use a high-stability shield to block its attacks.
- Defeat the boss to access a shortcut elevator to Quelaag's Domain.
Centipede Demon
- Descend further to find the Centipede Demon boss.
- Defeat it to obtain the Orange Charred Ring, which allows safe traversal on lava.
Shortcut to Lost Izalith
- If you are a Chaos Servant +2, unlock the shortcut to Lost Izalith near the Demon Firesage.
Covenants
Chaos Servant:
You can deepen this covenant by donating humanity to Quelaag's Sister in Quelaag's Domain. At rank 2 (30 humanity), you unlock a shortcut to Lost Izalith.
Shortcuts
Chaos Servant Shortcut
Requires Chaos Servant rank 2 to open the door leading directly to Lost Izalith.
Elevator to Quelaag's Domain
Found near the Demon Firesage, offering quick access back.
Soul Farming
Capra Demons:
-
- Use ranged attacks from high ground to kill them safely.
- Each Capra Demon grants a significant amount of Souls.
Burrowing Rockworms:
-
- Drops useful upgrade materials and respawn near the second bonfire.
Notes
- Ensure you have high durability or repair items due to the acid attacks from Rockworms.
- Equip the Orange Charred Ring to safely traverse lava fields.
Trivia
- The Demon Ruins were once part of the Lost Izalith civilization before its corruption by chaos.
- The Demon Firesage shares similarities with the Asylum Demon and Stray Demon.
- Ceaseless Discharge is the younger brother of the Daughters of Chaos.
Lost Izalith
 Lost Izalith (混沌の廃都イザリス) is a Location in Dark Souls. It is accessible via the Demon Ruins.
Information
Lost Izalith is a fiery, chaotic area accessible via the Demon Ruins. It is home to many powerful enemies and the infamous boss, Bed of Chaos. The area contains significant story events, including key interactions with Solaire of Astora, Kirk, Knight of Thorns, and Siegmeyer of Catarina.
Area Bosses
Mandatory
Bed of Chaos
- A three-phase boss with destructible orbs protecting its core.
- Drops:
- 60,000 Souls
- Lord Soul
- Strategy:
- Destroy the left and right orbs to weaken the Bed of Chaos.
- Traverse the collapsing floor to reach its core.
- Utilize ranged attacks or time dashes to avoid the fire scythes.
Enemies
Chaos Eaters
- Squid-like creatures that spit acid to degrade your equipment.
- Strategy:
- Attack from the side or rear to avoid their acid spray.
- Equip items with high durability.
Stone Demons
- Fire-spewing statues that line the pathways.
- Strategy:
- Their attacks are easily avoidable; running past them is often the safest option.
Chaos Bugs
- Small, spider-like creatures found near the shortcut.
- Drops:
- Sunlight Maggot (from the red-eyed Chaos Bug)
- Strategy:
- Use ranged attacks or quick melee strikes to dispatch them.
Bounding Demons of Izalith
- Massive, legless dragon torsos that patrol the lava.
- Drops:
- No significant drops.
- Strategy:
- Use the Orange Charred Ring to reduce lava damage and fight from range using magic or bows.
Titanite Demon
- Found in the shortcut path to Lost Izalith.
- Drops:
- Demon Titanite
- Strategy:
- Use ranged attacks or bait its melee strikes to create openings for counterattacks.
NPCs
Solaire of Astora
- Location: Found near the Titanite Demon in the shortcut area if his questline leads to his madness.
- Rescue: Opening the shortcut through the Chaos Servant covenant allows you to prevent his tragic fate.
- Drops (if killed):
- Solaire's Armor Set
- Sunlight Shield
- Sunlight Straight Sword
- Sunlight Talisman
Siegmeyer of Catarina
- Found in the Chaos Eater pit.
- Outcome depends on:
- His health during the fight.
- Whether the player kills all Chaos Eaters before speaking to him.
- Rewards:
- Pierce Shield
- Titanite Slab (if successfully assisted).
Kirk, Knight of Thorns
- Invades near the boss fog if the player is in human form.
- Drops:
- Thorn Set (upon all three invasions across the game)
- Barbed Straight Sword
- Spiked Shield
Items
Weapons
- Izalith Catalyst:
- Dropped by the NPC Grana, a Daughter of Chaos.
Helms
- Sunlight Maggot:
- Dropped by the red-eyed Chaos Bug.
- Functions as a headpiece that illuminates dark areas, crucial for the Tomb of the Giants.
Armor
- Gold-Hemmed Black Set:
- Found near Ceaseless Discharge in the Demon Ruins.
Consumables
- Twin Humanities:
- Found on the rooftops of structures within the lava field.
Titanite
- Demon Titanite:
- Dropped by the Titanite Demon in the shortcut path.
- Red Titanite Chunk:
- Found near the Chaos Eater pit.
- Red Titanite Slab:
- Found in the poison swamp below the Chaos Eater pit.
Walkthrough
Lava Field and Bounding Demons
- Equip the Orange Charred Ring to reduce lava damage.
- Use the stone roots to navigate safely across the lava field.
- Activate the hidden bonfire by striking the wall in the large tree-rooted building on the right side of the map.
Stone Demon Path
- Head straight from the hidden bonfire to enter a building filled with Stone Demons.
- Avoid engaging them; focus on running through to the staircase leading to the Chaos Eater Pit.
Chaos Eater Pit
- Prepare for acid attacks by unequipping fragile weapons and armor.
- Help Siegmeyer clear the area of Chaos Eaters, ensuring his health stays above 50%.
Final Path to the Bed of Chaos
- After the Chaos Eater pit, take the left path to encounter the Bed of Chaos.
- If you are human, prepare for Kirk's invasion.
Covenants
Chaos Servant
Joining this covenant and offering 30 Humanity allows access to the shortcut leading to Lost Izalith, bypassing parts of the area and enabling the rescue of Solaire.
Quests
Shortcuts
Chaos Servant Shortcut:
- Requires Chaos Servant rank 2.
- Allows direct access to the lower regions of Lost Izalith and prevents Solaire's tragic demise.
Soul Farming
Titanite Demons:
-
- Farm Demon Titanite and Souls by repeatedly defeating the Titanite Demon near the shortcut.
Chaos Bugs:
-
- Occasionally drop Sunlight Medals and Red Titanite Chunks.
Notes
- Equip Rusted Iron Ring when traversing the swampy areas beneath the Chaos Eater pit.
- The Bed of Chaos fight remains in the same state if the player dies, making subsequent attempts easier.
Trivia
- Lost Izalith was once a thriving city before the flame chaos corrupted it, transforming its inhabitants into demons.
- The Bed of Chaos contains remnants of the Witch of Izalith, one of the Lords from the game's opening cinematic.
New Londo Ruins
 New Londo Ruins (小ロンド遺跡) is a Location in Dark Souls. It is accessible via Firelink Shrine, and connects it to the Valley of Drakes and The Abyss.
Information
The New Londo Ruins is a haunting, waterlogged area beneath Firelink Shrine, filled with spectral enemies and a foreboding atmosphere. This location serves as a pivotal area in the game, connecting to the Valley of Drakes and containing several key items and shortcuts. The ruins are notable for their cursed inhabitants and treacherous terrain, which require preparation and strategic planning to traverse safely.
Area Bosses
Mandatory
Four Kings:
- Encountered after descending into the Abyss.
- Requires the Covenant of Artorias to survive in the Abyss.
- Notable for their group-based combat mechanics—new kings spawn over time.
- Rewards:
- 30,000 Souls.
- Bequeathed Lord Soul Shard.
- Unlocks the Darkwraith Covenant if conditions are met.
Enemies
Hollows:
-
- Passive unless attacked.
- Found near Firelink Shrine and Rickert of Vinheim.
Ghosts:
-
- Found throughout the ruins.
- Require the player to be cursed or use the Transient Curse to attack.
- Drops: Transient Curse, Jagged Ghost Blade (rare).
Darkwraiths:
-
- Found in the lower flooded ruins.
- Powerful enemies with high-damage attacks.
- Drops: Titanite Chunk, Titanite Slab (extremely rare), Dark Hand.
Banshees (Red-Eyed Ghosts):
-
- Scream to alert nearby enemies.
- Drops: Ghost Blade (rare).
Mass of Souls:
-
- Found near the flooded area.
- Emits spectral projectiles and spawns explosive heads.
- Does not respawn after defeat.
Merchants
Rickert of Vinheim:
-
- Location: Found near the entrance in a cell to the left.
- Services:
- Weapon reinforcement and repair.
- Sells basic magic upgrades and sorceries.
Ingward:
-
- Location: On the roof of the Ghost House.
- Role:
- Provides the Key to the Seal to drain the ruins after the Lordvessel is obtained.
- Sells Transient Curse.
- Can cure the player’s Cursed status for one Humanity.
NPCs
Darkstalker Kaathe:
-
- Appears after defeating the Four Kings if the player has not aligned with Frampt.
- Offers entry to the Darkwraith Covenant.
Crestfallen Warrior:
-
- After ringing the two Bells of Awakening, he becomes hollow and attacks near the ruins’ entrance.
Items
Weapons:
- Estoc: Found before the first bridge.
- Parrying Dagger: Found near the spiral staircase.
- Composite Bow: Found near the waterwheel elevator.
Shields:
- Dragon Crest Shield: Found in Valley of Drakes.
Armor:
- Fang Boar Helm: Rare drop from the Armored Tusk near the Valley of Drakes shortcut.
Key Items:
- Key to the Seal: Obtained from Ingward.
- Covenant of Artorias: Required to traverse the Abyss.
Consumables:
- Transient Curse: Found in vases and as drops from Ghosts.
- Fire Keeper Soul: Found on a ledge near the water.
Walkthrough
Entering the Ruins
- From Firelink Shrine, take the elevator down to New Londo Ruins.
- Left leads to the main path; right leads to Rickert of Vinheim and the Valley of Drakes shortcut.
Dealing with Ghosts
- Use Transient Curse to attack Ghosts.
- Stick to narrow walkways and pull enemies one at a time.
Exploring the Ghost House
- Enter cautiously to avoid being overwhelmed by multiple Ghosts and Banshees.
- Climb the hidden ladder in the fireplace to access the roof and meet Ingward.
Unlocking Shortcuts
- Drain the ruins using the Key to the Seal obtained from Ingward.
- Open the floodgates to reveal access to the lower areas and Valley of Drakes.
Covenants
Darkwraith Covenant:
- Led by Darkstalker Kaathe, who appears after defeating the Four Kings.
- Conditions:
- Do not place the Lordvessel with Kingseeker Frampt.
- Speak to Kaathe in the Abyss after the Four Kings' defeat.
- Rewards include Cracked Red Eye Orbs for invasions.
Shortcuts
Valley of Drakes:
-
- Unlock the gate using the Master Key or by obtaining the Key to the Seal.
Elevator to Firelink Shrine:
-
- Connects New Londo Ruins to Firelink Shrine.
Soul Farming
Ghosts:
- Consistently drop Transient Curse and Souls.
- Ideal for farming curses and small amounts of Souls early on.
Notes
- Transient Curse is essential for dealing with enemies in this area—stock up before entering.
- Be cautious of the environment, as water and narrow pathways can lead to accidental falls.
- Use ranged weapons to safely deal with Ghosts hiding in walls or ceilings.
Trivia
- The waterlogged state of New Londo was a deliberate measure to contain the Darkwraiths and the Abyss by drowning its population.
- Ingward moves to Firelink Shrine after his purpose in the ruins is fulfilled.
- The ruins are one of the few areas in the game without a bonfire, forcing reliance on shortcuts.
Tomb of the Giants
 Tomb of the Giants (巨人墓場) is a Location in Dark Souls. It is accessible after The Catacombs.
Information
The Tomb of the Giants is a dark, perilous area with near-pitch black lighting. It is home to large skeletal enemies, traps, and challenging terrain. Light is essential for survival here, with tools such as the Skull Lantern, Sunlight Maggot, or the Light sorcery being invaluable.
Area Bosses
Mandatory
Gravelord Nito:
- The final boss of the area, found in a large underground crypt.
- Utilizes devastating AoE attacks and summons skeletons.
- Drops the Lord Soul and 60,000 souls upon defeat.
Enemies
Giant Skeletons:
-
- Wield either greatswords or large bows. Slow but extremely powerful.
- Bow-wielding skeletons can be mitigated with careful positioning.
Beast Skeletons:
-
- Fast and aggressive four-legged enemies. Extremely high attack power and resilience.
- Best fought in open spaces; avoid confined areas.
Skeleton Poles:
-
- Tall skeletal enemies with polearms. Dangerous in groups.
Baby Skeletons:
-
- Found in Nito’s lair. Inflict poison and can overwhelm with numbers.
Black Knight (Halberd):
-
- Found near the first fog gate. Drops high-quality gear but is challenging to defeat.
Merchants
Trusty Patches:
- Found near the third slide. Sets traps for the player but becomes a merchant afterward.
- Sells rare items such as Humanity, Crescent Axe, and Divine Blessings.
- Can relocate to Firelink Shrine after reconciliation.
Items
Key Items:
- Skull Lantern:
- Dropped by Necromancers in the Catacombs or found near Patches' trap.
- Necessary for lighting the area.
- Large Divine Ember:
- Found in a hidden room accessed via the shortcut to the Catacombs.
- Used for Divine weapon upgrades.
Weapons and Gear:
- Murakumo:
- Dropped by Greatsword-wielding Giant Skeletons.
- Sanctus:
- Dropped by Paladin Leeroy. Provides minor HP regeneration.
- Grant:
- Dropped by Paladin Leeroy. A powerful great hammer requiring high Strength and Faith.
Rings:
- Covetous Silver Serpent Ring:
- Found near a ledge after defeating a Giant Skeleton Archer. Increases soul gain from defeated enemies.
Upgrade Materials:
- White Titanite Shards:
- Frequently dropped by Skeleton Poles.
- Found near the Room of Chaos.
- White Titanite Slabs:
- Found in Nito’s arena, near the Baby Skeletons.
Walkthrough
From the Catacombs to the First Bonfire
- After defeating Pinwheel, climb the ladder in the back of his room.
- Follow the path marked with Prism Stones to navigate the dark. Equip a light source.
- Giant Skeletons wielding greatswords and bows guard the path. Avoid or eliminate them carefully.
- Look for the first slide, which leads to the area with Trusty Patches and the first bonfire.
From the First Bonfire to the Second Bonfire
- From the bonfire, take the left path past Patches to reach a ladder leading downward.
- Beware of Beast Skeletons lurking in narrow passages. Draw them to open areas to fight.
- Continue past the fog gate, defeating the Black Knight and Giant Skeletons.
- The second bonfire is located to the left of a large open area near a cliff.
From the Second Bonfire to Nito
- Proceed carefully past multiple Beast Skeletons. Stick to the walls to avoid ambushes.
- In the next large room, deal with the Skeleton Poles and Baby Skeletons.
- The fog gate at the end leads to Gravelord Nito.
Shortcuts
First Bonfire Shortcut:
-
- Near the first Giant Skeleton, jump off the ledge to land near the Large Divine Ember room.
Skip to Nito:
-
- After the second bonfire, hug the right wall to bypass most enemies and reach the fog gate.
Soul Farming
Baby Skeletons:
-
- In the area near Nito’s fog gate, Baby Skeletons spawn infinitely. They are an infinite and relatively fast source of souls.
- Effective with high-poise armor and a fast weapon.
- In the area near Nito’s fog gate, Baby Skeletons spawn infinitely. They are an infinite and relatively fast source of souls.
Skeleton Poles:
-
- Found near the second bonfire. Drop White Titanite Slabs, which can be sold for a high amount of souls.
Notes
- The Tomb of the Giants was inspired by ancient catacombs and crypts, with a strong emphasis on claustrophobia and fear of the unknown.
- Light is essential for exploring safely. Use the Skull Lantern, Sunlight Maggot, or Light sorcery.
Trivia
- Palaid Leeroy is likely a reference to the infamous World of Warcraft player Leeroy Jenkins, who famously rushed into a raid without preparing or waiting for his party members.
Ash Lake
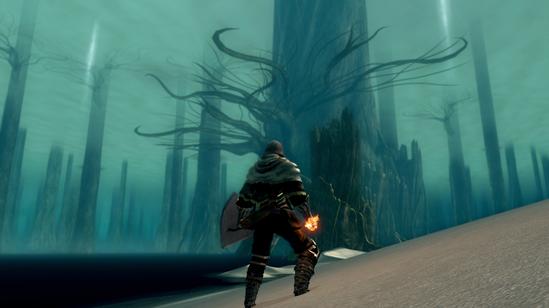 Ash Lake (地底湖) is a Location in Dark Souls. It is accessible via The Great Hollow.
Information
Ash Lake is a serene yet desolate area, home to the ancient Stone Dragon, one of the few surviving Everlasting Dragons. It is accessible through The Great Hollow, and while it is not mandatory for progression, it offers unique treasures, enemies, and lore.
Enemies
Lake Hydra
- A more powerful variant of the Hydra found in the Darkroot Basin.
- HP and damage output are increased.
- Attacks:
- Water projectiles: Long-range, highly damaging.
- Head slams: Close-range attacks.
- Drops:
- Dragon Scale (x2)
- Strategy:
- Fight on the sandy shore to avoid deep water hazards.
- Use a high-stability shield to block projectiles.
- Attack heads after they slam down.
- Using a bow from a safe position (e.g., behind the fallen tree) is effective but requires many arrows.
Clams (Five-Legged Shell Beasts)
- Found near the Stone Dragon and along the path.
- Attacks:
- Body slam
- Double snap
- Bite attack: Inflicts equipment durability damage.
- Drops:
- Twinkling Titanite
- Purging Stone (rare)
- Strategy:
- Avoid direct confrontation; attack from behind.
- Use ranged magic or pyromancy to safely dispatch.
- Attacks:
Other Enemies
- Mushroom Men and Basilisks:
- Found within the large hollow tree on the way to the Stone Dragon.
- Behave the same as their counterparts in The Great Hollow.
Items
Weapons
- Dragon Greatsword:
- Obtained by cutting off the tail of the Stone Dragon.
- Can only be obtained once per playthrough.
Rings
- Great Magic Barrier (Miracle):
- Found inside the large hollow tree. Requires careful navigation of branching paths to reach.
Consumables
-
Dragon Scales:
- Drops from the Hydra (x2).
- Found as loot (x3) along the sandy path.
-
Purging Stone:
- Rare drop from Clams.
Upgrade Materials
- Twinkling Titanite:
- Dropped by Clams.
- Dragon Scales:
- Found as loot and dropped by the Hydra.
Walkthrough
Getting Started
- Access Ash Lake through The Great Hollow.
- Prepare for fall damage during the descent. Use Fall Control or Cat Ring to minimize risks.
Progression
- First Bonfire:
- Located at the beginning of the sandy shore, to the right after exiting The Great Hollow.
- Rest here to make it a warpable bonfire.
- Lake Hydra:
- Encountered shortly after the first bonfire.
- Defeat it to clear the area for safer exploration.
- Large Hollow Tree:
- Found along the path. Contains Basilisks, Mushroom Men, and the Great Magic Barrier.
- Stone Dragon:
- At the far end of Ash Lake.
- Pray at its feet to join the Path of the Dragon covenant.
- Cutting its tail grants the Dragon Greatsword.
Returning
- If warpable bonfires are unlocked, you can fast travel back.
- Otherwise, you must backtrack through The Great Hollow.
Covenants
Path of the Dragon
Join this covenant by praying at the Stone Dragon located at the far end of Ash Lake. This covenant focuses on PvP invasions through the use of the Dragon Eye.
Soul Farming
Clams:
- Farm for Twinkling Titanite and Purging Stones.
Notes
- Avoid resting at the second bonfire near the Stone Dragon unless warpable bonfires are unlocked.
- Use ranged attacks against the Hydra to avoid unnecessary risk.
- Equip gear with high curse resistance (e.g., Cursebite Ring) for areas with Basilisks.
Trivia
- ???
Chasm of the Abyss
Chasm of the Abyss (過去森) is a Location in Dark Souls. It is reached after location, and before location.
Information
Area Bosses
Mandatory
Optional
Enemies
Merchants
this area has these merchants
NPCs
this area has these NPCs
Items
this area spawns these items
Walkthrough
Covenants
Quests
Shortcuts
Soul Farming
Notes
Trivia
Painted World of Ariamis
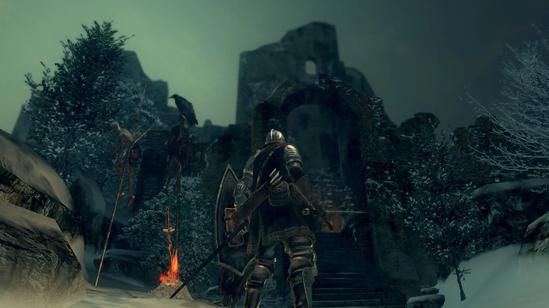 Painted World of Ariamis (エレーミアス絵画世界) is a Location in Dark Souls. It is reached after location, and before location.
Information
The Painted World of Ariamis is a secluded, snowy area in Dark Souls, designed to imprison the half-dragon Priscilla. Once you enter, you cannot leave until you reach Priscilla's domain. This fantastical yet foreboding area is filled with unique enemies and significant loot. Be prepared before entering, as bonfire warping and external item purchases are inaccessible within the area.
Area Bosses
Crossbreed Priscilla
- Location: At the end of the Painted World.
- Drops:
- Soul of Priscilla
- Priscilla’s Dagger (cut off her tail).
- Strategy:
- Priscilla becomes invisible during the fight.
- Look for her footprints in the snow to locate her.
- Poison is effective, as it negates her stealth advantage.
- She is passive until attacked—players can leave without fighting her.
Enemies
Hollow Soldiers:
-
- Basic enemies wielding bows or swords.
- Can be dealt with using standard melee or ranged attacks.
Bloated Hollows:
-
- Emit toxic blood upon death. Use fire-based attacks to avoid exposure.
- Found throughout the level, often in groups.
Harpy (Velka’s Crow Demon):
-
- Large, crow-like enemies with high poise and dangerous grab attacks.
- Weak to fire and ranged attacks. Can be lured off ledges.
Phalanx:
-
- A group of shielded hollows wielding spears.
- Highly vulnerable to fire attacks like Chaos Fireball or Combustion.
Wheel Skeletons:
-
- Aggressive enemies that attack with spinning charge attacks.
- Best handled by luring one at a time or using a shield with 100% physical damage reduction.
Dragon Zombie:
-
- Found on a bridge before Priscilla.
- Breathes poison clouds but is weak to fire and magic.
Merchants
There are no merchants within the Painted World. Prepare before entering by purchasing:
- Purple Moss Clumps (for Toxic).
- Ample arrows if using a bow.
Items
Key Items
- Strange Doll:
- Found in the Northern Undead Asylum (required for entry).
- Dark Ember:
- Found in the annex. Unlocks occult weapon upgrades.
Weapons
- Priscilla’s Dagger:
- Cut from Priscilla’s tail.
- Iato Whip:
- Dropped by Jeremiah, the yellow-clad invader.
Armor
- Painting Guardian Set:
- Found in a treasure chest near the spiral staircase.
- Velka’s Set:
- Found near the annex.
Rings
- Bloodshield:
- Found near the Dragon Zombie.
- Increases resistance to poison, bleed, and curse.
Miscellaneous
- Dried Finger:
- Found on a rooftop. Increases PvP invasions.
- Red Sign Soapstone:
- Found at the top of the spiral staircase, used for PvP invasions.
- Souvenir of Reprisal:
- Drops from Harpies.
Walkthrough
Entrance
- Obtain the Strange Doll from the Northern Undead Asylum.
- Interact with the large painting in Anor Londo to enter the Painted World.
Exploring the World
- Follow the path to the first bonfire.
- Progress through the snowy terrain, facing groups of hollows and Phalanx enemies.
- Open shortcuts to the bonfire to simplify traversal.
The Annex
- Use the Annex Key to access the tower.
- Defeat enemies guarding the Dark Ember and Velka’s Set.
Reaching Priscilla
- Battle through narrow corridors guarded by Hollows and Harpies.
- The Dragon Zombie blocks a bridge before her domain. Defeat or bypass it.
- Use ranged attacks to handle archers guarding the path.
Leaving the Painted World
- After defeating Priscilla, exit through the rear of her chamber.
- This returns you to Anor Londo, in front of the painting.
Covenants
The Painted World does not itself feature any covenants directly but contains items and characters linked to covenants:
- Blades of the Darkmoon:
- Obtain Souvenir of Reprisal by farming Harpy enemies (drops linked to the covenant).
Shortcuts
- Annex Key: Unlocks a door to a significant portion of the level.
- Bridge Jump: Use the Dragon Zombie's area to shortcut to Priscilla's chamber.
Soul Farming
Phalanx Area:
- Efficient farming method. Use fire spells or large AoE attacks to quickly defeat them.
Notes
- Killing Priscilla removes the ability to revisit the Painted World during the same playthrough.
- The area is highly toxic; stock up on moss and avoid unnecessary contact with Bloated Hollows.
Trivia
- The Painted World is the first area designed for PvP.
- Priscilla is one of the only bosses who offers peaceful dialogue instead of combat.
Royal Wood
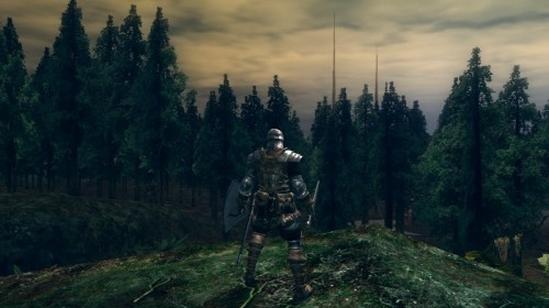 Royal Wood (過去森) is a Location in Dark Souls. It is reached after location, and before location.
Information
Area Bosses
Mandatory
Optional
Enemies
Merchants
this area has these merchants
NPCs
this area has these NPCs
Items
this area spawns these items
Walkthrough
Covenants
Quests
Shortcuts
Soul Farming
Notes
Trivia
The Abyss
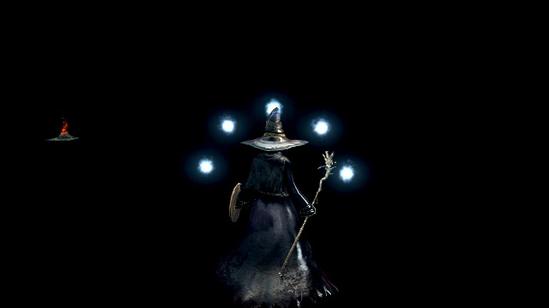 The Abyss (深淵) is a Location in Dark Souls. It is accessible via New Londo Ruins.
Information
The Abyss is a foreboding arena located at the heart of the New Londo Ruins, serving as the battleground for the Four Kings, one of the essential bosses to progress the main story. Accessing the Abyss requires the Covenant of Artorias ring to prevent instant death upon entering the dark void. This requirement extends to summoned allies. After defeating the Four Kings, the ring is no longer necessary.
Area Bosses
Mandatory
Four Kings
- Location: The Abyss, accessed by jumping from the spiral staircase in New Londo Ruins.
- Mechanics:
- The fight starts with one king; additional kings spawn over time.
- A shared health bar; killing one contributes to the total depletion.
- Kings attack with sweeping melee strikes, grabs, and homing magic projectiles.
- Requirements:
- Must wear the Covenant of Artorias ring to survive in the Abyss.
- Drops:
- Bequeathed Lord Soul Shard (needed for the Lordvessel).
- 20,000 Souls.
Enemies
Darkwraiths:
-
- Wielding swords and shields, they deal high damage and can steal humanity with their grab attack.
- Drop Titanite Chunks and occasionally Dark Hand.
Ghosts:
-
- Immune to standard attacks unless using a Transient Curse or cursed weapon.
- Drop Transient Curses, Jagged Ghost Blade, and Titanite Chunks.
Merchants
Darkstalker Kaathe
- Appears in the Abyss after defeating the Four Kings, provided the Lordvessel was not placed with Frampt.
- Offers to take the player to the Firelink Altar to place the Lordvessel.
- Items Sold (upon joining the Darkwraith covenant):
- Cracked Red Eye Orb: Used to invade other players.
- Dark Hand: Given for free upon joining.
NPCs
Ingward
- Located at the top of a building in New Londo.
- Gives the Key to the Seal if the player has the Lordvessel.
- Can also be killed to obtain the key prematurely.
Items
Key Items
-
Covenant of Artorias:
- Required to survive in the Abyss.
- Obtained after defeating Great Grey Wolf Sif in Darkroot Garden.
-
Key to the Seal:
- Used to open the floodgates in New Londo Ruins.
- Acquired from Ingward in the ruins.
Drops
- Dark Hand:
- Dropped by Darkwraiths or received from Kaathe.
- Titanite Chunks:
- Dropped by Darkwraiths and ghosts.
Walkthrough
Reaching the Abyss
-
Preparation:
- Equip the Covenant of Artorias ring.
- Bring Transient Curses to fight ghosts or use a cursed weapon like the Jagged Ghost Blade.
- Stock up on healing items and repair gear, as New Londo is treacherous.
-
Drain the Flood:
- Speak to Ingward to obtain the Key to the Seal or kill him to retrieve it.
- Use the key to open the floodgate, draining the water in the ruins and revealing new pathways.
-
Descend the Ruins:
- Clear out Darkwraiths and ghosts while navigating the now-dry ruins.
- Reach the spiral staircase leading to the Abyss.
-
Entering the Abyss:
- Equip the Covenant of Artorias before jumping from the spiral staircase into the void.
Fighting the Four Kings
-
-
- Stay aggressive to defeat each king before additional ones spawn.
- Use high-damage weapons and healing spells to counter their relentless attacks.
- Roll or sidestep to avoid grab attacks and block magic projectiles with a shield.
-
Covenants
Darkwraith Covenant
- How to Join:
- Do not place the Lordvessel on the altar via Kingseeker Frampt.
- Defeat the Four Kings and meet Darkstalker Kaathe in the Abyss.
- Accept his offer and pledge loyalty.
- Benefits:
- Receive the Dark Hand.
- Purchase Cracked Red Eye Orbs to invade other players.
- Notes:
- Aligning with Kaathe causes Frampt to disappear, making it impossible to trade Titanite with him.
Shortcuts
- After draining the water, the ruins become accessible, creating shortcuts to the Abyss.
- Use the bonfire near Firelink Shrine for faster traversal.
Soul Farming
Darkwraiths:
- Efficient for farming Titanite Chunks and Dark Hand.
- Use Covetous Gold Serpent Ring to increase drop rates.
Notes
- The Covenant of Artorias is mandatory for survival in the Abyss.
- Avoid summoning phantoms unless they also have the ring equipped.
- Fighting the Four Kings without sufficient damage output can lead to overwhelming difficulty as new kings spawn.
Trivia
- Darkstalker Kaathe and Kingseeker Frampt are two serpents aligned with different ideologies regarding the Lordvessel.
- The Abyss signifies the expanding influence of the Dark and humanity's descent into chaos.
- The Four Kings were once noble rulers, now corrupted by the Dark.
The Duke's Archives
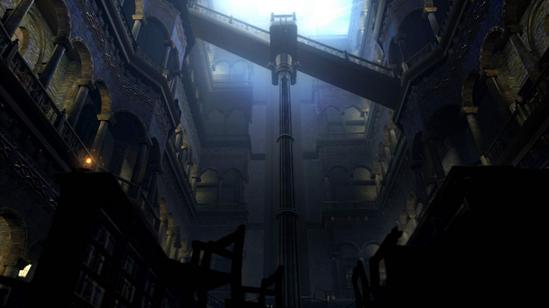 The Duke's Archives (公爵の書庫) is a Location in Dark Souls. It is accessed via Anor Londo and leads to Crystal Cave.
Information
The Duke's Archives is a sprawling library and research facility built by Seath the Scaleless, located near Anor Londo. Entry is barred by a yellow fog gate until the Seal of Gwyn is broken by defeating Ornstein and Smough. Players cannot summon or be invaded until after the scripted defeat against Seath the Scaleless. The area includes challenging enemies, complex puzzles, and significant loot. It leads to the Crystal Cave, where Seath is fought for the second and final time.
Area Bosses
Mandatory
Seath the Scaleless
- Location:
- First encounter: Duke's Archives.
- Final battle: Crystal Cave.
- Scripted Defeat:
- Seath's attacks regenerate his health, making the encounter unwinnable.
- Players leave behind souls and humanity upon defeat. Use consumables beforehand or equip a Ring of Sacrifice to avoid losing them.
- Final Battle:
- Destroy the glowing crystal to nullify Seath's regeneration.
- His attacks cause heavy damage and inflict Curse. Equip high Curse Resistance gear like the Cursebite Ring.
- Drops:
- Moonlight Greatsword (cut off his tail).
- Bequeathed Lord Soul Shard.
Enemies
Armored Tusk:
-
- Found at the entrance. Unlike earlier versions, their backs are protected by armor, preventing backstabs. Use fire, magic, or poison to defeat them.
- Do not respawn after being killed.
Crystal Hollow:
-
- Standard enemy throughout the area. They deal significant damage when buffed by the Channelers.
Channeler (Six-Eyed Sorcerer):
-
- Found in multiple areas, they buff nearby enemies and teleport away when threatened.
- Use ranged attacks or take them out quickly in melee to avoid their magical barrages.
Mimic:
-
- Disguised as treasure chests. Can be identified by their chain placement or attacked to reveal their true form.
- Drops items such as the Crystal Knight Shield and Magic Falchion.
Crystal Golem:
-
- Found in the garden outside the Archives. One gold Golem appears in the center to release Siegmeyer’s daughter, Sieglinde.
Scaleless Beast (Pisaca):
-
- Blue, snake-like monsters found in the prison tower. They attack aggressively but can be avoided when music stops.
- Two passive Pisacas drop miracles (Soothing Sunlight, Bountiful Sunlight).
Merchants
Big Hat Logan:
- Found imprisoned in the Archives Tower.
- Once freed, sells powerful sorceries including Crystal Soul Spear.
- After purchasing all his spells and defeating Seath the Scaleless, Logan goes mad and can be found in Seath's first encounter room.
Items
Key Items
-
Archives Tower Giant Cell Key:
- Found near the music device controlling the Pisacas.
- Opens the prison cell where Logan is held.
-
Large Magic Ember:
- Found in Seath's first encounter room after defeating him.
-
Archive Tower Giant Door Key:
- Used to exit the tower.
Weapons
-
Moonlight Greatsword:
- Cut from Seath's tail.
-
Avelyn:
- A triple-shot crossbow found in a hidden bookshelf.
-
Crystal Knight Shield:
- Dropped by a Mimic in the Archives.
Armor
-
Sage Robe Set:
- Found where Logan was sitting after he goes mad.
-
Channeler Set:
- Dropped by Channelers.
Rings
-
Ring of Sacrifice:
- Found throughout the Archives and helpful for Seath's scripted death.
-
Bellowing Dragoncrest Ring:
- Boosts sorcery damage. Dropped by Logan if hostile.
Miscellaneous
-
Blue Titanite Slab:
- Found in the Crystal Cave.
-
Crystal Ember:
- Hidden behind a bookcase near the exit to the Crystal Cave.
Walkthrough
Initial Exploration
- Armored Tusk Encounter: The entrance is guarded by two Armored Tusks. Use ranged attacks or fire-based damage to handle them.
- First Bonfire: Found after defeating the Tusks, past an elevator.
Prison Sequence
- After the scripted defeat against Seath, players awaken in a tower prison:
- Kill the snake guard to obtain the Archive Prison Extra Key and escape.
- Avoid or defeat the Pisacas to advance.
Archives Main Section
Crystal Cave
- Use the invisible walkways to reach Seath’s final arena.
- Follow messages or drop Prism Stones to guide your path.
Covenants
No covenant is directly tied to the Duke's Archives, but significant items for magic builds and the Path of the Dragon covenant (via Seath's scales) can be found here.
Shortcuts
- Rotating Staircase: Allows access between levels in the Archives.
- Hidden Door in Library: Leads to the Crystal Ember and additional loot.
Soul Farming
-
Crystal Golems:
- Found in the garden outside the Archives.
- Drop Blue Titanite Chunks and provide decent souls.
-
Pisacas:
- Can be repeatedly farmed after resetting the area.
Notes
- The scripted defeat does not penalize humanity or souls if a Ring of Sacrifice is equipped.
- Mimics appear frequently in the Archives. Always check treasure chests before opening.
Trivia
- Seath is one of the few dragons allied with Lord Gwyn during the ancient war. His immortality stems from his experiments with crystals.
- Big Hat Logan’s story highlights his obsession with Seath's knowledge, leading to his eventual madness.
Kiln of the First Flame
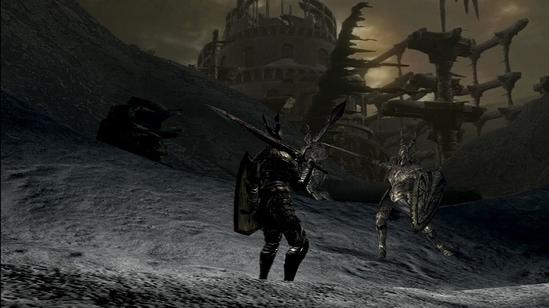 Kiln of the First Flame (大墓) is a Location in Dark Souls. It is only accessible after the player has placed all four Lord Souls in the Lordvessel.
Information
The Kiln of the First Flame serves as the final stage of Dark Souls. It becomes accessible after placing the four Lord Souls (or equivalent shards) in the Lordvessel at Firelink Altar, opening the grand door leading to this ultimate arena. The path is straightforward, with minimal exploration and five Black Knights guarding the approach to the final boss, Gwyn, Lord of Cinder. Be cautious of frequent PvP invasions in this area if you remain in human form.
Area Bosses
Mandatory
Gwyn, Lord of Cinder
-
Location: Found at the end of the Kiln of the First Flame.
-
Attack Patterns:
- Fast, sweeping melee attacks.
- A grab move that deals significant damage.
- Leaping slash and thrust attacks to close distance quickly.
-
Strategies:
- Parry and Riposte:
- Gwyn’s attacks are predictable and can be parried with proper timing.
- Equip the Hornet Ring to amplify critical damage.
- Recommended weapons: fast-striking weapons with high critical bonuses (e.g., Bandit’s Knife with Occult infusion).
- Circle and Strike:
- Keep close to Gwyn and circle around to bait grab attacks or slashes with long recovery times.
- Punish his missed attacks with quick weapon strikes.
- Tank and Smash:
- Use heavy armor like Havel’s Set and the Iron Flesh pyromancy for increased defense.
- Engage directly, focusing on sustained melee damage.
- Summon Help:
- If you completed Solaire’s questline, his summon sign will appear near the third Black Knight.
- Use Solaire as a distraction to land attacks on Gwyn.
- Pyromancy Barrage:
- Equip Great Combustion or Great Fireball with a fully upgraded pyromancy flame.
- Use Iron Flesh for added protection during close-range casting.
- Parry and Riposte:
-
Drops:
- Soul of Gwyn, Lord of Cinder (used to craft the Great Lord Greatsword or consumed for 20,000 souls).
Enemies
Black Knights:
-
- Found in five variations along the path to Gwyn:
- Sword Black Knights (x2): Drop Black Knight Sword, Black Knight Shield, and Titanite Chunk.
- Greatsword Black Knight: Drops Black Knight Greatsword, Black Knight Shield, and Red Titanite Chunk.
- Greataxe Black Knight: Drops Black Knight Greataxe, Black Knight Shield, and White Titanite Chunk.
- Halberd Black Knight: Drops Black Knight Halberd, Black Knight Shield, and Blue Titanite Chunk.
- Respawn at the Kiln's bonfire, making them excellent for farming Titanite Chunks.
- Found in five variations along the path to Gwyn:
Wandering Humanity Phantoms:
-
- Rarely appear on the bridge under certain conditions.
- Drop Humanity or Twin Humanities.
Items
Armor
- Black Knight Armor Set:
- Located on the right side of the narrow path near the third Black Knight.
- Includes the full Black Knight Set, known for its high fire resistance.
Upgrade Materials
- Titanite Chunks:
- Dropped by all Black Knights (red, blue, white, and standard varieties).
Weapons
- Black Knight Weapons:
- Each Black Knight has a chance to drop their respective weapon.
Walkthrough
-
Accessing the Kiln:
- Place the Lordvessel at the Firelink Altar after acquiring the four Lord Souls.
- The grand door at Firelink Altar opens, revealing the Kiln.
-
Navigating the Path:
- Fight through five Black Knights on a straightforward path to Gwyn.
- Engage each Black Knight carefully, as they hit hard and can overwhelm unprepared players.
- Use the nearby bonfire to rest and prepare for the final encounter.
-
Optional Summon:
- If Solaire of Astora survived his questline, his summon sign appears just past the third Black Knight.
-
The Final Encounter:
- Enter the fog gate to face Gwyn, Lord of Cinder.
- Choose your preferred strategy to defeat him and prepare for the ending.
Covenants
This area does not host any specific covenants, but actions taken here—such as choosing to link the flame or walk away—may influence lore interpretations tied to covenants such as the Darkwraiths or Warriors of Sunlight.
Soul Farming
Black Knights:
- Farmable at the Kiln’s bonfire.
- Each knight drops 1-3 Titanite Chunks (specific types based on their weapon).
- Excellent for upgrading weapons or farming rare Black Knight weapons.
Notes
- The Kiln’s atmosphere reflects the remnants of the Age of Fire, with ashen terrain and a somber tone.
- Defeating Gwyn triggers an unskippable ending:
- Link the Flame: Rekindle the First Flame and prolong the Age of Fire.
- Leave the Flame: Walk away and usher in the Age of Dark.
Trivia
- The Kiln of the First Flame is designed to evoke themes of finality and sacrifice.
- Gwyn’s Theme is a melancholic piano piece, symbolizing his tragic fall from a great Lord to a hollowed guardian.
- The Black Knight Set found here is one of the most iconic armor sets in the game, favored for its lore and resistances.
The Catacombs
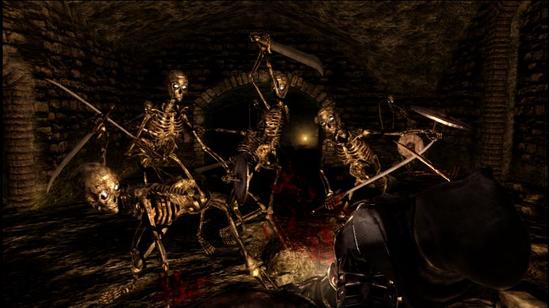 The Catacombs (地下墓地) is a Location in Dark Souls. It is accessible via Firelink Shrine, and leads to the Tomb of the Giants.
Information
The Catacombs is a treacherous area, filled with traps, reanimating skeletons, and perilous paths. It serves as the gateway to the Tomb of the Giants and features critical NPCs and items for progression. The area is challenging due to its dark atmosphere, undead enemies, and environmental hazards.
Area Bosses
Mandatory
Pinwheel:
- A relatively weak boss found at the end of the Catacombs.
- Uses fire, lightning, and dark magic attacks, while creating clones to confuse the player.
- Drops Rite of Kindling, increasing Estus Flask capacity to 20, and one of the Masks of the Father, Mother, or Child.
Enemies
Reanimating Skeletons:
-
- Revive indefinitely unless their associated Necromancer is killed or a Divine weapon is used.
- Common strategies include knocking them off ledges or using Force to push them.
Necromancers:
-
-
- Non-respawning enemies controlling the skeletons.
- Drop lanterns required for visibility in the Tomb of the Giants.
-
Exploding Floating Skulls (Vengeful Skulls):
-
- Explode upon proximity, damaging nearby enemies as well as the player.
Wheel Skeletons:
-
- Spin towards the player at high speed, inflicting heavy damage and stamina drain.
Titanite Demon:
-
- Found near the shortcut to the Tomb of the Giants. Drops Demon Titanite upon defeat.
Black Knight:
-
- Found in the lower levels, wielding a Greataxe. Beware of high damage and fast attacks.
Merchants
Trusty Patches/Patches the Hyena:
- Found near the rotating spiked bridge. Attempts to kill the player by rotating the bridge.
- After the trap, apologizes and offers items for sale, including:
- Humanity
- Divine Blessings
- Crescent Axe
NPCs
Paladin Leeroy (Summon):
-
- Summon sign appears near the Titanite Demon area if the player is Human. Useful for the Pinwheel boss fight.
Vamos the Blacksmith:
-
- Located in a lower chamber. Specializes in Fire and Chaos weapon upgrades.
Items
Key Items:
- Rite of Kindling: Dropped by Pinwheel. Increases Estus Flask capacity to 20.
- Skull Lantern: Dropped by Necromancers. Necessary for navigating the Tomb of the Giants.
Weapons and Equipment:
- Lucerne: Found in a small room near the bow-wielding skeletons.
- Great Scythe: Near the second bridge, accessible by jumping from the middle of the bridge.
- Divine Weapon: Essential for preventing skeletons from reanimating.
- Mask of the Mother/Father/Daughter: 1x randomly dropped by Pinwheel.
Consumables:
- Humanity: Dropped by enemies or found in various locations.
- Soul of a Proud Knight: Scattered throughout the area.
Walkthrough
From Firelink Shrine to the First Bonfire
- Enter the Catacombs and descend the spiral stairs. Beware of two skeletons on the way.
- Follow the path until reaching a ladder leading to a room with Necromancers and skeletons.
- Turn left and break the crumbling wall to find the first bonfire.
Progressing to the Second Bonfire
Reaching the Boss
- Descend through the skeleton-infested caves, eliminating Necromancers to prevent reanimation.
- Look for Paladin Leeroy’s summon sign near the Titanite Demon room.
- The boss fog gate for Pinwheel is directly ahead.
Shortcuts
Titanite Demon Room:
-
- Drop from a small ledge near the first bridge to skip several areas.
Wheel Skeleton Area:
-
-
- From the Titanite Demon’s location, jump to the ledge below to reach the Wheel Skeleton chamber directly.
-
Backtrack Shortcut:
-
- After defeating Pinwheel, climb the ladder near his arena to return to earlier sections of the Catacombs.
Quests
Nito’s Covenant:
- Located near the Titanite Demon area. Enter a coffin with an active Eye of Death to meet Nito.
- Covenant rewards include Gravelord Sword and the Gravelord Sword Dance miracle.
Soul Farming
Wheel Skeletons:
-
- Farmable in the lower chamber. Effective with ranged attacks or AoE spells.
Necromancer and Skeleton Loops:
-
- Clear Necromancer-controlled areas, return to the bonfire, and repeat.
Notes
- Divine weapons are helpful for preventing skeletons from reanimating. A Divine weapon can be created from the Astora’s Straight Sword or upgraded via Andre of Astora.
- Be sure not to miss Trusty Patches' dialogue, as it enables the player to access rare items later in the game.
- Killing the Nectromancers will permanently stop Skeletons from reviving.
Trivia
- Paladin Leeroy is a reference to the infamous meme “Leeroy Jenkins.”
- The Masks dropped by Pinwheel represent a father, mother, and child, symbolizing his tragic backstory as a failed necromancer.
Quelaag's Domain
Quelaag's Domain is a Location in Dark Souls. It is reached after location, and before location.
Information
Area Bosses
Mandatory
Optional
Enemies
Merchants
this area has these merchants
NPCs
this area has these NPCs
Items
this area spawns these items
Walkthrough
Covenants
Quests
Shortcuts
Soul Farming
Notes
Trivia
The Great Hollow
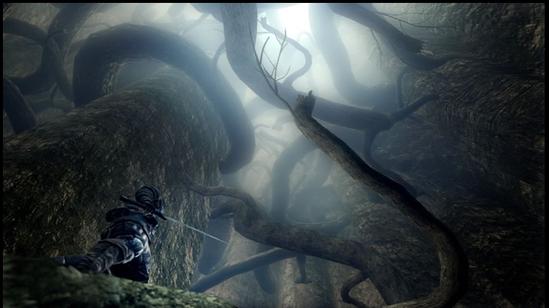 The Great Hollow (大樹のうつろ) is a Location in Dark Souls. It is accessible via Blighttown and leads to Ash Lake.
Information
The Great Hollow is a vertical labyrinth connecting Blighttown and Ash Lake, filled with hazardous drops, valuable loot, and rare enemies. This area requires careful navigation due to the many opportunities for falling to your death.
Enemies
Standard Enemies
Basilisks:
-
- Found in three main areas.
- Attacks:
- Curse Mist: Inflicts curse, instantly killing the player if the meter fills.
- Drops:
- Eye of Death (rare)
Large Mushroom Men:
-
-
- Slow-moving but deal massive damage with punches.
- High health pool.
-
Small Mushroom Men:
-
-
- Low health and easily dispatched, but travel in groups.
-
Crystal Lizards:
-
- Found throughout the area.
- Drops:
- Twinkling Titanite (100%)
- Various titanite chunks and slabs (low chance).
Items
Shields
- Wooden Shield:
- Found early in the area in a treasure chest.
Rings
- Cloranthy Ring:
- Found by dropping from the starting path to a hidden area below.
- Effect: Boosts stamina regeneration.
Consumables
- Eye of Death:
- Dropped by Basilisks.
- Large Soul of a Nameless Soldier:
- Found near the Basilisk pits.
Upgrade Materials
- Twinkling Titanite: Guaranteed drop from Crystal Lizards.
- Titanite Chunks: Drops from Crystal Lizards.
- Titanite Slabs: Rare drop from Crystal Lizards.
- Red, Blue, and White Titanite Chunks: Dropped by Crystal Lizards.
- Green Titanite Shards: Dropped by Crystal Lizards.
Walkthrough
Getting Started
- Access The Great Hollow from Blighttown's poison swamp.
- Look for a large tree root near the leech area.
- The first wall behind the chest containing the Wooden Shield is illusory. Strike it to reveal the path.
- Beyond this is another illusory wall hiding the entrance to The Great Hollow.
Progression
- Bonfire: The only bonfire in The Great Hollow is located just past the entrance.
- Use branches and roots to navigate downward:
- Beware of falling damage. Use Fall Control or Cat Ring to minimize risks.
- Avoid walking too close to edges.
- Encounter Basilisks at three points:
- Prepare for curse buildup by equipping the Cursebite Ring or managing spacing.
Climbing Back Up
- Backtracking is possible but challenging due to tricky ledges.
- Use backsteps to scale certain obstacles.
Ash Lake Path
- The final large root at the bottom leads to Ash Lake.
- Encounter Mushroom Men near the final descent.
Shortcuts
- Drop Method: Instead of following the full path, carefully drop between branches to quickly descend.
- Illusory Walls: Reveal shortcuts or hidden items by striking walls.
Soul Farming
Crystal Lizards:
- Reloading near their spawn points allows multiple attempts at farming their drops.
- Equip the Covetous Gold Serpent Ring for higher drop rates.
Notes
- Equip the Rusted Iron Ring for better footing on slippery surfaces.
- Use ranged attacks to deal with Basilisks from a safe distance.
- Manage your health and stamina carefully to avoid fatal mistakes during falls.
- Avoid fighting Mushroom Men directly if you're under-leveled.
Trivia
- The Great Hollow is one of the few areas with no boss fight, focusing instead on platforming and exploration.
- The abundance of Crystal Lizards makes this an essential area for farming rare titanite.
Crystal Cave
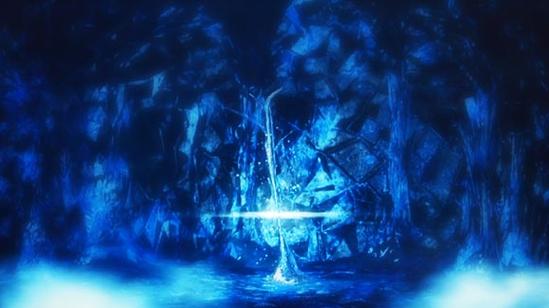 Crystal Cave (結晶洞穴) is a Location in Dark Souls. It is accessible via The Duke's Archives, and houses the final battle with Seath the Scaleless.
Information
The Crystal Cave is a treacherous area connected to the Duke’s Archives, serving as the final battleground against Seath the Scaleless. The cave is notable for its invisible bridges and powerful enemies. Navigating the area requires extreme caution, as falling is a constant risk. There is no bonfire within the Crystal Cave until Seath is defeated, making the Duke’s Archives bonfire the nearest resting point.
Area Bosses
Mandatory
Seath The Scaleless
- Location: At the end of the Crystal Cave.
- Battle Mechanics:
- Destroy the Primordial Crystal in the room to prevent Seath from regenerating.
- His attacks include crystal breath (causes Curse), tail swipes, and melee swipes.
- Focus on breaking his tail for the Moonlight Greatsword.
- Drops:
- Moonlight Greatsword (cut from his tail).
- Bequeathed Lord Soul Shard.
- Primordial Crystal remains (in lore).
Enemies
Crystal Golems:
-
- Found near the entrance and in the cave. Two advanced versions appear with higher damage and health.
- Use ranged attacks to lure them into safer areas.
Moonlight Butterfly:
-
- Passive unless provoked.
- Attacks with magic beams if engaged. Drops Blue Titanite Chunk (high chance) and Blue Titanite Slab (low chance).
Clam Enemies (Five-Legged Bivalves):
-
- Found near Seath’s boss room.
- Highly aggressive, with powerful attacks and durability-reducing bites.
- Drops Twinkling Titanite and Purging Stones.
Crystal Lizards:
-
- Found in a tunnel before the Clams.
- Drops various Titanite materials. Ensure to catch them before they disappear.
NPCs
Big Hat Logan:
- If not freed from the Duke’s Archives, defeating Seath will trigger his escape.
- He will relocate to a study room in the Archives for his final questline.
Items
Key Items
- Primordial Crystal:
- Found in Seath's arena. Breaking it nullifies Seath’s immortality.
Upgrade Materials
-
Blue Titanite Chunk:
- Dropped by Moonlight Butterflies and found on various paths.
-
Blue Titanite Slab:
- Found on a hidden path near the end of the cave.
-
Twinkling Titanite:
- Dropped by Clams.
Miscellaneous
-
Soul of a Hero:
- Located near the final stretch to the Clams.
-
Humanity:
- Found early on near the first invisible bridge.
Walkthrough
Preparation
- Stock up on Prism Stones or arrows to mark invisible paths.
- Equip items to mitigate Curse, such as the Cursebite Ring or armor with high Curse resistance.
- Bring a ranged weapon for safe engagement with distant enemies.
Path to Seath
-
Entering the Cave:
- Defeat or avoid Crystal Golems in the garden.
- Pass through the fog gate into the Crystal Cave.
-
Invisible Bridges:
- Use floating crystal particles to locate safe paths. Dropping Prism Stones ensures visibility.
- The first bridge leads to Humanity.
-
Crystal Golem Section:
- A stronger Crystal Golem guards a pathway leading to two routes:
- Straight ahead: Leads to Seath’s arena.
- Detour left: Leads to a Blue Titanite Slab.
- A stronger Crystal Golem guards a pathway leading to two routes:
-
Final Bridge:
- Carefully navigate the last bridge, which slopes downward toward Seath’s area.
-
Clam Area:
- Five Clams guard the path to Seath. Pull them one at a time to avoid being overwhelmed.
-
Seath’s Arena:
- Engage the boss after destroying the Primordial Crystal in the room.
Covenants
No covenant is directly associated with the Crystal Cave, but defeating Seath contributes to the Lordvessel questline.
Shortcuts
No traditional shortcuts exist. However:
- Invisible paths can be memorized or marked for future runs.
- Use the message “fall ahead” near bridges to drop down to specific areas safely.
Soul Farming
-
Clams:
- High drop rates for Twinkling Titanite and Purging Stones.
- Farming is straightforward after Seath is defeated, as the nearby bonfire provides easy access.
-
Crystal Golems:
- Found early in the cave, dropping decent souls and Titanite materials.
Notes
- The invisible bridges are one of the most unique and challenging mechanics in Dark Souls. Use visual cues or drop items to ensure safe passage.
- Seath’s Curse attacks can be mitigated with Curse Resistance items and spells.
Trivia
- The Crystal Cave is where Seath conducts his research, making it the origin of his experiments in immortality.
- The Primordial Crystal hints at the ancient secrets of the dragons, tying Seath’s betrayal to his pursuit of knowledge.
Artorias of the Abyss DLC Locations
Sanctuary Garden
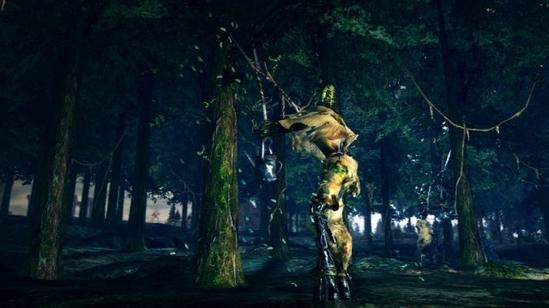 Santuary Garden (過去森) is a Location in Dark Souls. It is the first location in the Artorias of the Abyss DLC.
Information
The Sanctuary Garden is the first area encountered in the Artorias of the Abyss DLC for Dark Souls. To access this content, specific prerequisites must be met (detailed below). This area is the gateway to the Royal Wood, Oolacile Township, and other sections of Oolacile, as players explore the past of Lordran.
Access Requirements
To enter the Sanctuary Garden, the following steps are necessary:
-
DLC Purchase:
- Purchase the Artorias of the Abyss DLC via PlayStation Network or own a version of the game that includes it (e.g., Artorias of the Abyss Edition or Remastered).
-
Preliminary Steps:
- Place the Lordvessel at the Firelink Altar.
- Defeat the Hydra in Darkroot Basin and rescue Dusk of Oolacile (by defeating the Golden Crystal Golem in the cave).
- In the Duke's Archives, defeat the Crystal Golem near the first elevator to acquire the Broken Pendant.
- Return to the cave where you found Dusk. A dark portal will appear in the location where the Golden Golem was. Interact with it to be transported to the Sanctuary Garden.
Area Bosses
Sanctuary Guardian
-
The Sanctuary Guardian is the first boss of the DLC and must be defeated to progress further.
-
Appearance: A chimera-like creature with a lion’s body, a scorpion’s tail, and large, bat-like wings.
-
Abilities:
- Lightning Breath: A wide, fast-moving stream of lightning, difficult to dodge if not anticipated.
- Poisonous Tail Swipe: A tail attack that inflicts poison buildup if it connects.
- Melee Attacks: Includes pounces, headbutts, and claw swipes.
- Aerial Charges: Frequently flies into the air and swoops down to attack.
-
Strategies:
- Lightning Resistance: Equip shields or armor with high lightning resistance (e.g., Crest Shield, Havel's Set).
- Cutting the Tail: Focus on severing its tail early in the fight to prevent poison tail swipes and acquire the Guardian Tail weapon.
- Stamina Management: The Sanctuary Guardian attacks rapidly, so balance blocking with dodging to conserve stamina.
- Ranged Combat: Utilize magic or bows to attack safely from a distance when it pauses to use its breath attack.
-
Drops:
- Guardian Soul: Can be consumed for 12,000 souls or used to craft Sanctuary Guardian Whip.
Walkthrough
-
Arrival:
- Upon entering through the dark portal, you will immediately find a bonfire in front of you. Use it to prepare for the upcoming boss fight.
-
The Boss Arena:
- The Sanctuary Guardian awaits in the open garden area ahead.
- Engage the boss using strategies outlined above.
-
After the Fight:
- Upon defeating the Sanctuary Guardian, the path forward to Oolacile Sanctuary opens. Proceed through the gate to explore the rest of the DLC content.
Notes
- The Sanctuary Garden sets the tone for the challenging encounters in the DLC. The Sanctuary Guardian is a test of adaptability, requiring both melee and ranged strategies.
- Consider leveling up or reinforcing your gear at the bonfire if you struggle with this boss.
Trivia
- The Sanctuary Guardian’s design is inspired by traditional chimera mythology, blending features of multiple creatures.
- Its poison-inflicting tail is one of the few tail attacks in the game that applies a status effect, making it a unique challenge.
Oolacile Sanctuary
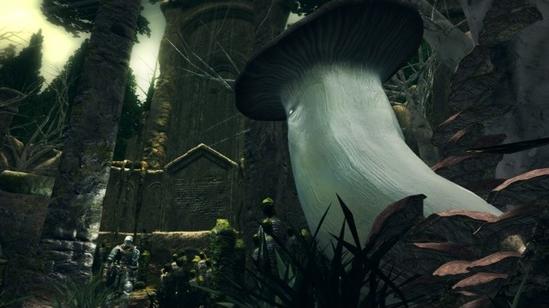 Oolacile Sanctuary (ウーラシールの霊廟) is a Location in Dark Souls. It is accessible after the Sanctuary Garden, and provides access to the Royal Wood.
Information
The Oolacile Sanctuary serves as the hub area in the Artorias of the Abyss DLC, where players encounter the serene yet mysterious Elizabeth, a large sentient mushroom who is a caretaker of Princess Dusk of Oolacile. The Sanctuary provides access to other key areas in Oolacile, including the Royal Wood and the Sanctuary Garden.
NPCs
Elizabeth, the Keeper of the Sanctuary
-
Location: Found on the left side of the sanctuary, near the wall.
-
Description: Elizabeth is a large, sapient mushroom, described as a guardian and former caretaker of Princess Dusk.
-
Interactions:
- When spoken to, she inquires whether the player intends to aid Dusk of Oolacile.
- After initial conversations, Elizabeth offers a selection of items and unique magic for sale.
-
Merchandise:
- Elizabeth’s Mushroom: A consumable that provides significant health regeneration over a short period.
- Oolacile Magic:
- Cast Light: Illuminates dark areas.
- Repair: Repairs equipped weapons and armor.
- Hidden Weapon: Conceals a weapon, rendering it invisible.
-
Questline:
- Elizabeth references the plight of Dusk and encourages the player to aid in defeating Manus, the Father of the Abyss, who has abducted her.
- After Manus is defeated, Elizabeth will acknowledge the player's success and thank them.
Items
Humanity:
- Location: Found on a corpse behind an exterior pillar along the outer edge of the sanctuary.
Walkthrough
-
Arrival:
- After defeating the Sanctuary Guardian in the Sanctuary Garden, proceed through the gate to reach the Oolacile Sanctuary. The bonfire here serves as a checkpoint for further exploration.
-
Interacting with Elizabeth:
- Speak with Elizabeth to learn about Dusk and the threat posed by Manus. She will provide lore insights about Oolacile's fall and Dusk’s role in its history.
- Purchase magic or items if needed.
-
Proceeding to Connected Areas:
- From the Sanctuary, you can access:
- Royal Wood: Proceed through the path beyond the sanctuary.
- Sanctuary Garden: Return through the gate behind you.
- From the Sanctuary, you can access:
Notes
- Elizabeth’s Mushroom is one of the most effective healing items in the game, offering unparalleled regeneration. Stock up if possible.
- Elizabeth's demeanor and role are reminiscent of The Great Mushroom (Darkroot Garden), further connecting her to Oolacile's mysterious past.
Trivia
- Elizabeth is considered a maternal figure to Dusk, akin to a nursemaid or governess.
- The sanctuary’s peaceful atmosphere sharply contrasts with the darkness and chaos that lie in Oolacile’s other regions.
Royal Wood
Royal Wood is a Location in Dark Souls. It is accessible via Oolacile Sanctuary, and leads to Oolacile Township.
Information
The Royal Wood is a lush and mysterious forest reminiscent of the Darkroot Garden in Lordran. This area, part of the Artorias of the Abyss DLC, serves as the battlefield for epic encounters and key events. The forest is home to guardians, stone knights, and ancient secrets tied to the kingdom of Oolacile.
Area Bosses
Knight Artorias
- Location: Found at the end of the Royal Wood.
- Description: A tragic and corrupted figure, Artorias once stood as one of Gwyn's Four Knights. He has fallen to the Abyss, and players must face him in a pivotal boss battle.
- Details: See "Knight Artorias" for full combat strategies and lore.
Black Dragon Kalameet
- Location: The valley below the Royal Wood.
- Description: Kalameet is a fearsome optional boss, not directly tied to the main DLC storyline but one of the most challenging encounters in the game.
- Details: See "Black Dragon Kalameet" for full strategies and assistance from Hawkeye Gough.
Enemies
Wooden Guardians:
-
- Resemble walking trees and are often seen trimming branches.
- Some are passive until provoked (e.g., near the Gold Coin).
Stone Knights:
-
- Durable enemies capable of powerful attacks.
- Found patrolling the forest in several locations.
Merchants
Marvelous Chester
- Location: Found on a side path near the entrance to the arena where Artorias resides.
- Description: A sinister figure with a long hat and unsettling laughter, Chester sells items but at exorbitant prices. His inventory is not particularly unique.
- Merchandise:
- Throwing knives
- Blooming Purple Moss Clumps
- Lloyd’s Talismans
- Notes: His cryptic demeanor and sharp tongue make him one of the DLC’s more enigmatic characters.
- Further Information: See "Marvelous Chester."
Hawkeye Gough
-
- Location: Found imprisoned in the upper levels overlooking Artorias’ arena.
- Description: Gough, one of Gwyn's Four Knights, is a master archer who crafts Gough’s Great Arrows. He aids in the battle against Kalameet if the player speaks to him with the Crest Key.
- Merchandise:
- Gough’s Great Arrows
- Carved Wooden Heads (two types)
- Further Information: See "Hawkeye Gough."
NPCs
Lord’s Blade Ciaran
- Location: Appears near Artorias’ grave after he is defeated.
- Description: One of Gwyn's Four Knights, Ciaran mourns Artorias and asks for his soul. In return, she offers the Gold Tracer and Silver Tracer weapons.
- Questline:
- If you give her Artorias’ Soul, she will leave after some time.
- If you refuse, she will remain until she is attacked or ignored for a significant duration.
- Further Information: See "Lord’s Blade Ciaran."
Items
Armor
-
- Helm: Found near the second bridge; beware of the nearby drop.
- Armor: Located near Gough’s Great Arrows above the second bridge.
- Gauntlets: At the shortcut area, where Alvina once appeared in Darkroot Garden.
- Boots: Found along the walls of the flower field.
Consumables
-
- High Knight's Soul: Near the hidden elevator leading to Artorias.
- Brave Warrior’s Soul: Two in Kalameet’s valley.
- Hero’s Soul: Found in the deepest part of the valley.
Upgrade Materials
-
- Blue Titanite Slab: Found near a bushy patch that resembles where the Enchanted Ember would be in Darkroot Garden.
- Titanite Slab: In Kalameet’s valley, below the waterfall.
Unique Items
-
- Gough’s Great Arrows: Scattered along cliffs near Kalameet’s area.
- Gold Coin: Near the passive Wooden Guardian trimming branches.
Walkthrough
Path to Artorias
- Progress through the lush woods, battling Guardian Knights and Stone Soldiers.
- Activate the elevator near the arena to unlock a shortcut.
- Defeat Knight Artorias in a challenging duel.
Path to Kalameet
- Head to the valley below the Royal Wood after speaking with Gough.
- If the player has the Crest Key, Gough will shoot down Kalameet, making the dragon fight accessible.
Shortcuts
Activate the elevator near Artorias’ arena to link the upper and lower parts of the Royal Wood for quicker traversal.
Soul Farming
Notes
Trivia
- The Royal Wood is thought to represent the Darkroot Garden in its earlier form, long before it succumbed to the Abyss.
- Alvina, a companion to Artorias, is not seen in the DLC but her presence is subtly hinted at through the forest's design.
Trial of Champions
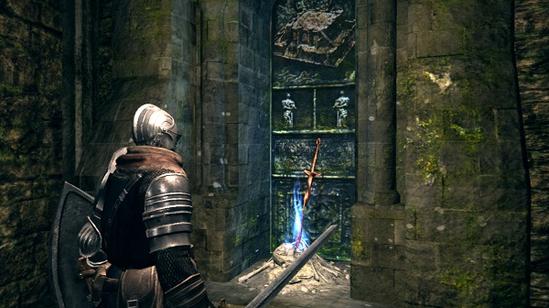 The Trial of Champions (試練の戦い) is a Location in Dark Souls. It is accessible via Oolacile Township.
Information
The Trial of Champions is an online-exclusive PvP arena introduced in the Artorias of the Abyss DLC. This area offers structured competitive battles across various formats, allowing players to test their mettle against others. The arena is conveniently located near the Oolacile Township Bonfire, just past the area where Knight Artorias is defeated. Players can participate in battles ranging from one-on-one duels to chaotic free-for-alls.
Rules
Arena Options
- Stages:
- Arena: A circular platform.
- Ruins: An open area with cover for strategic battles.
- Matchmaking:
- Level 1–50
- Level 51–100
- Level 101–200
- Level 200+
- Modes:
- Duels: One-on-one combat lasting 3 minutes.
- Co-op Battles: Two-on-two team matches lasting 6 minutes.
- Free-for-Alls: Four players battling for dominance over 6 minutes.
Starting a Match
- Enter the holding room to the right after exiting Knight Artorias’s arena toward Oolacile Township.
- Interact with the blue bonfire in the holding room to select a stage and match type.
- Once transferred, wait behind a mechanical gate until the match begins. Standing in front of the gate designates you as the host.
Victory Conditions
- Crown System:
- A large crown indicates the player with the most takedowns when the timer ends.
- A small crown is awarded in case of a tie.
- Scoring:
- Duels: Only personal takedowns count.
- Co-op Battles: Takedowns are shared among team members.
- Free-for-Alls: Takedowns of any player add points for everyone except the fallen.
Key Rules
- Matches are timed (3 minutes for duels, 6 minutes for team battles and free-for-alls).
- Falling behind in kills results in no loss of streak; only defeat resets a winning streak.
- Returning to the holding room or quitting the game resets the streak to zero.
- Special recovery and durability items like Repair Powder or Repair spells are essential to sustain longer matches.
Restricted Items
Certain items are not usable in the Trial of Champions:
-
- Healing Items:
- Estus Flask
- Humanity
- Twin Humanity
- Goddess’s Blessing
- Elizabeth’s Mushroom
- Online Tools:
- All multiplayer interaction items.
- Healing Items:
Mechanics
- Safe Period: Players cannot take damage immediately after dropping from the mechanical gate at the start of a match.
- Ring Indicators: A red ring floating above a gate signifies a player is waiting behind it, reducing matchmaking priority for that gate.
- Persistence: Buffs, such as weapon enchantments, persist even after being defeated.
- Death Reset: Losing does not turn the player hollow in the Trial of Champions, ensuring players remain in human form throughout matches.
Items
- Purple Coward’s Crystal:
- Usage: Allows the player to leave the match and return to their world.
- Availability: Always provided when participating in the Trial of Champions.
Notes
- Players should strategically use Repair Powder and durability-restoring spells to maintain weapon and armor effectiveness during extended sessions.
- The purple crystal, obtainable in the arena, allows players to leave matches early without penalty.
Trivia
- Rankings displayed on the Heroic Monument in the holding room reflect the most recent performance of a character. Switching characters does not update the displayed record.
- The arena offers a unique opportunity for strategic and thematic PvP battles, with players able to use a wide variety of builds and equipment setups.
- Although healing items are restricted, players can prepare for long battles using Repair Powder, spell buffs, or other means to maintain their edge.
Oolacile Township
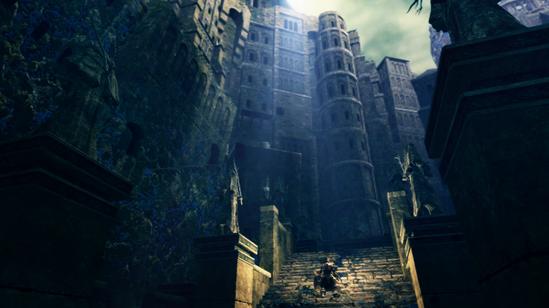 Oolacile Township (ウーラシール市街) is a Location in Dark Souls. It is accessible via Royal Wood, and leads to the Chasm of the Abyss.
Information
The Oolacile Township is a once-thriving city that has been corrupted by the Abyss, transforming its citizens into monstrous beings. This area features numerous enemies, dark magic-wielding sorcerers, and a variety of hidden treasures. The township connects to other key areas in the Artorias of the Abyss DLC and contains notable NPCs, shortcuts, and items.
Enemies
Oolacile Sorcerers
- Use high-speed and high-damage dark magic.
- Counter Strategies:
- Silver Pendant: Reflects dark magic attacks, creating openings for counterattacks.
- Ranged Combat: Use bows or spells to avoid direct confrontation.
Items
Silver Pendant
- Location: Near the first sorcerer, after descending the stairs.
- Follow the right-hand path outside the building to a tower-like structure.
- How to Access:
- Look for the "Light ahead…" message outside.
- Use a light source such as:
- Skull Lantern
- Sunlight Maggot
- Cast Light spell
- This reveals a hidden room containing the pendant.
Crest Key
- Location: Later in the area, within a dimly lit building.
- How to Access:
- Descend a long staircase and spot a lit fireplace.
- Perform a roll from a nearby wooden platform to land inside the fireplace room.
- The key is found there.
Dark Orb:
-
- Location: Treasure chest in a room with two sorcerers.
- Note: An empty chest nearby acts as a trap.
Twin Humanities:
-
- Location: From the Crest Key room, descend to a balcony and jump to the roof below. Follow the roof to the right.
Dark Fog:
-
- Location: Found on a corpse hanging in a wide hall filled with enemies.
Red Titanite Chunk:
-
- Location: On the second floor of a collapsed wooden structure.
- How to Access: Use a light source near the dead end to reveal a hidden passage.
Mimic Faces:
-
- "Very Good!": Dropped by a mimic in the township.
- "I'm Sorry.": Dropped by a sorcerer near the Dark Orb treasure room.
Walkthrough
Entrance
- After exiting the coliseum where Knight Artorias is fought:
- Right Path: Leads to the Trial of Champions arena.
- Left Path: Leads to a locked door requiring the Crest Key, which is found later in the area.
Shortcuts
- A shortcut mirroring the Royal Wood mechanics is located in the right-hand building past an area crowded with enemies.
- This shortcut can save significant time when traversing the township.
Notes
- Light sources are crucial for discovering hidden areas and treasure in this dark and corrupted zone.
- Dark magic can be overwhelming; items like the Silver Pendant are essential for survival.
- Many items require precise platforming and exploration of the area’s vertical design.
Trivia
- The messages "Light ahead…" and "Hidden path…" are unique to the Oolacile Township, encouraging the use of light mechanics introduced in the DLC.
- The transformation of the city is a thematic parallel to the descent into the Abyss seen in other parts of the game.
Chasm of the Abyss
 The Chasm of the Abyss (深淵の穴) is the final Location in Dark Souls Artorias of the Abyss DLC. It is accessible via Oolacile Township.
Information
The Chasm of the Abyss is a dark and foreboding area within the Artorias of the Abyss DLC. The area is shrouded in darkness and inhabited by roaming Humanities, ethereal beings that embody the concept of human essence. It serves as the path to the final boss of the DLC, Manus, Father of the Abyss, and features key NPC interactions and hidden treasures.
Area Bosses
Manus, Father of the Abyss
- The final boss of the area. and arguably the final boss of Dark Souls.
- Known for his brutal melee attacks and dark magic.
- Drops: 60,000 Souls, Soul of Manus, Humanity.
- See Manus, Father of the Abyss for detailed strategies.
Enemies
Humanities
- Description: Black, amorphous creatures resembling large versions of the in-game Humanity icon.
- Behavior:
- Slowly float toward the player.
- Touch damage only; they do not stagger on contact, making them dangerous in groups.
- Strategy:
- Use AoE spells or weapons to control crowds.
- Avoid running directly through them; instead, lure and eliminate them systematically.
NPCs
Alvina's Phantom
Great Grey Wolf Sif
- Location: Beyond the hidden passage revealed by following Alvina’s phantom.
- Interaction:
- Sif is surrounded by Humanities, lying weak.
- Defeat all surrounding Humanities to free Sif.
- Sif howls and disappears, leaving the Greatshield of Artorias.
- After this event, Sif can be summoned as a white phantom for the fight against Manus.
Items
Shields
- Greatshield of Artorias:
- Dropped by Sif after defeating the surrounding Humanities and freeing him from their clutches.
- Use: High stability and Abyss resistance; ideal for fights against dark magic.
Magic
- Black Flame (Pyromancy):
- Location: At the bottom of a path accessed via the shortcut near Alvina's phantom.
Upgrade Materials
- White Titanite Slab:
- Location: At the first fork after spotting the boss fog gate; take the right path.
Misc
- Help Me! Carving:
- Location: Found by dropping from the left-hand cliff in the large room filled with Humanities.
Walkthrough
Shortcuts
Shortcut to the Royal Wood Boss Area:
- Follow Alvina's phantom through the Humanities-infested zone.
- A hidden passage opens near a rock wall, connecting to the Royal Wood boss arena.
- After unlocking, it becomes faster to access the Chasm from the Oolacile Township bonfire.
Notes
- This area is densely packed with Humanities, making light sources crucial for navigation.
- Unlocking the shortcut and freeing Sif are optional but highly recommended for both lore and gameplay benefits.
- The Silver Pendant (obtained in Oolacile Township) is essential for deflecting Manus’s dark magic during his fight.
Trivia
- The Humanities enemies are a direct reference to the in-game Humanity item, emphasizing Manus's connection to the Abyss and his role in corrupting the city of Oolacile.
- Sif's appearance in the Chasm of the Abyss provides additional lore, linking the events of the DLC to the main story.